February will see spring calving kicking off on many suckler farms around Ireland.
Over the next three weeks, we will run a series of articles offering advice and tips as spring calving gets under way.
First up is our top tips for managing the cow in the runup to calving and during labour.
Next week will cover problems that arise at calving time, with caring for the newborn calf in the final instalment.
Pre-calving minerals and ad-lib silage
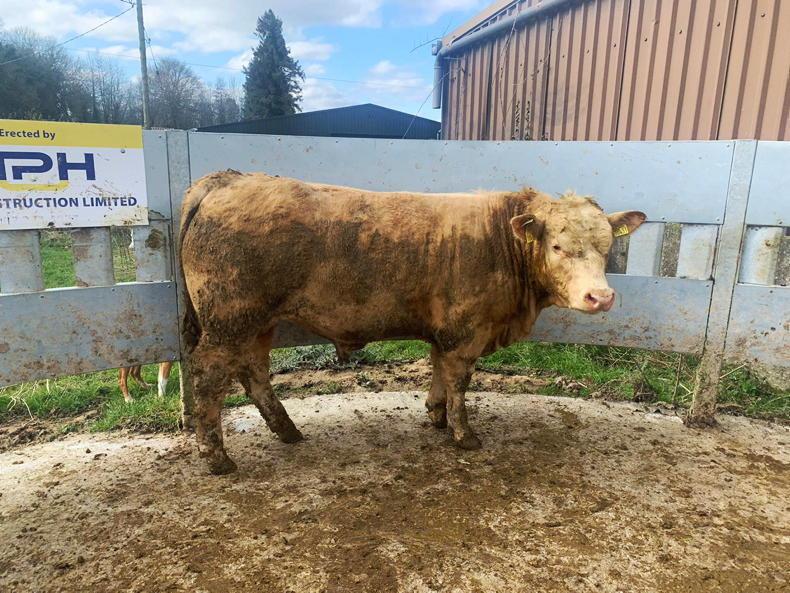
Cows calving inside the next month should be getting minerals and silage fed to appetite.
It is too late to alter the body condition of February-calving cows which are on the thin or fat side. This should have been done back in October and November.
There is little to be gained by restricting silage so close to calving in an effort to slim down cows. If anything, it will cause more problems than it solves.
If heavily pregnant cows are underfed because silage is being restricted, their energy intake will be reduced.
This can make cows lethargic in labour with weak contractions, increasing the level of intervention needed.
There is also a higher risk of metabolic issues at calving time. Most susceptible are older cows, animals with twins and cows with a strong dairy influence.
Therefore, during the final two to three weeks of gestation, offer cows silage on an ad-lib basis.
Some farmers find that the routine of feeding silage in late evening cuts down on animals calving through the night.
It is important to start around two to three weeks before calving begins. Offer cows enough silage to last until the next afternoon.
This means cows are hungry by evening time when fresh silage is offered. The cow then eats according to appetite, then lies and ruminates, which can delay the onset of labour.
Moving cows to calving pens
Some farmers prefer to move cows on to straw bedding a few days before calving. It is a popular choice for farmers with off-farm employment.
By moving cows in advance, they will automatically calve on straw should the farmer be away for work. Also, there is less chance of newborn calves being trampled as would be the case in a group pen.
Just be sure to move cows before they go into labour as the sudden change in environment increases stress levels and can delay the calving process.
There is more expense with this option as shed space and bedding requirements increase.
There is also more work involved with topping up straw beds as well as offering feed and water.
The alternative is to leave cows alone until they pass the water bag, then move to a calving pen.
However, someone needs to be present for every calving. Otherwise, calves can get trampled or pick up disease from lying with a wet navel directly in contact with dirty slats.
Make sure that calving pens are clean. Wash and disinfect any calving pen used as a sick bay this winter. Alter calving gates so that they are in working order.
The calving gate should be able to open in a forward direction, thereby releasing a cow that goes down while it is in the head lock.
Also, check there is enough room to use the calving jack on cows held in the head gate.
Calving pens should be at least 12ft by 12ft for moderate-sized cows, increasing to 13ft by 13ft for larger cows.
Keep safety in mind. Calving pens should have at least two escape points should cows become aggressive.
When in use, secure the calving gate to the side wall with a rope, rather than a chain. If a cow goes down, the pressure exerted on the gate makes it hard to release the safety chain. A rope can be cut.
Store items such as ropes, gloves and lubricant in a container that can be hung on a calving gate with a simple hook. This way, when assisting the cow during labour, these items are within easy reach.
When to intervene at calving
Most cows will calve on their own. But when no progress is being made, intervention will be necessary.
For heifers, step in earlier than you would with a mature cow. As a rule of thumb, step in after around one hour of the water bag being presented if there is no sign of progress.
For mature cows, allow two hours from passing the water bag if no progress has been made.
Don’t rush in to pull the calf. Check that the cow has opened properly.
There are times these rule of thumbs can be ignored.
For instance, when a calf is coming backwards, a cow is carrying twins, or when you do the first morning check and are unsure how long the cow has been in labour or last thing at night.
If cows are calving to a new stock bull for the first time, it can give peace of mind to step in and assist cows more than normal until confidence grows.
Check for normal presentation
When calving a cow, it is vital that you know what feels normal. First off, check that both front feet are forward and in the right position.
Legs coming backwards will need correcting and comes with experience. Check the calf’s head is forward and that the tongue is not swollen.
Pay attention to the colour of the fluids as the water bag is presented. Fluids should be clear or slightly yellow in colour. If fluids are red or brown, the calf is in difficulty and requires immediate delivery.
If you put your arm inside the cow and it starts to rotate, the animal’s uterus is probably twisted and veterinary intervention will be needed.
Making a call on big calves
As you check calf presentation, if the front legs are starting to cross over, this is a sign of a big calf and its shoulders are being squeezed in the pelvic canal.
This is the time to make the call for veterinary intervention, rather than taking a chance on pulling a big calf which gets stuck and dies.
Double-looping the calving ropes
When attaching the calving ropes, use a double loop method. The first loop should be above the fetlock and the second just below this joint. Two loops spreads the pressure being exerted on the calf’s leg as the jack is tensioned.
In the wrong hands, the jack increases the risk of an injured or dead calf, so it should only be used by an experienced operator. When using the jack, never stand between the ratchet bar and side wall.
As the cow pushes, stop ratcheting. Lever the bar downwards in a smooth motion. As the cow relaxes, raise the bar upwards and take up the slack.
If the calf gets stuck at the hips, release the pressure from the jack to let the calf breathe.
Re-apply lubricant and try to work one of the calf’s hips out by levering jack to one side.
Read more
Five essentials for every calving kit
Feeding cows in the evening to delay calving at night
February will see spring calving kicking off on many suckler farms around Ireland.
Over the next three weeks, we will run a series of articles offering advice and tips as spring calving gets under way.
First up is our top tips for managing the cow in the runup to calving and during labour.
Next week will cover problems that arise at calving time, with caring for the newborn calf in the final instalment.
Pre-calving minerals and ad-lib silage
Cows calving inside the next month should be getting minerals and silage fed to appetite.
It is too late to alter the body condition of February-calving cows which are on the thin or fat side. This should have been done back in October and November.
There is little to be gained by restricting silage so close to calving in an effort to slim down cows. If anything, it will cause more problems than it solves.
If heavily pregnant cows are underfed because silage is being restricted, their energy intake will be reduced.
This can make cows lethargic in labour with weak contractions, increasing the level of intervention needed.
There is also a higher risk of metabolic issues at calving time. Most susceptible are older cows, animals with twins and cows with a strong dairy influence.
Therefore, during the final two to three weeks of gestation, offer cows silage on an ad-lib basis.
Some farmers find that the routine of feeding silage in late evening cuts down on animals calving through the night.
It is important to start around two to three weeks before calving begins. Offer cows enough silage to last until the next afternoon.
This means cows are hungry by evening time when fresh silage is offered. The cow then eats according to appetite, then lies and ruminates, which can delay the onset of labour.
Moving cows to calving pens
Some farmers prefer to move cows on to straw bedding a few days before calving. It is a popular choice for farmers with off-farm employment.
By moving cows in advance, they will automatically calve on straw should the farmer be away for work. Also, there is less chance of newborn calves being trampled as would be the case in a group pen.
Just be sure to move cows before they go into labour as the sudden change in environment increases stress levels and can delay the calving process.
There is more expense with this option as shed space and bedding requirements increase.
There is also more work involved with topping up straw beds as well as offering feed and water.
The alternative is to leave cows alone until they pass the water bag, then move to a calving pen.
However, someone needs to be present for every calving. Otherwise, calves can get trampled or pick up disease from lying with a wet navel directly in contact with dirty slats.
Make sure that calving pens are clean. Wash and disinfect any calving pen used as a sick bay this winter. Alter calving gates so that they are in working order.
The calving gate should be able to open in a forward direction, thereby releasing a cow that goes down while it is in the head lock.
Also, check there is enough room to use the calving jack on cows held in the head gate.
Calving pens should be at least 12ft by 12ft for moderate-sized cows, increasing to 13ft by 13ft for larger cows.
Keep safety in mind. Calving pens should have at least two escape points should cows become aggressive.
When in use, secure the calving gate to the side wall with a rope, rather than a chain. If a cow goes down, the pressure exerted on the gate makes it hard to release the safety chain. A rope can be cut.
Store items such as ropes, gloves and lubricant in a container that can be hung on a calving gate with a simple hook. This way, when assisting the cow during labour, these items are within easy reach.
When to intervene at calving
Most cows will calve on their own. But when no progress is being made, intervention will be necessary.
For heifers, step in earlier than you would with a mature cow. As a rule of thumb, step in after around one hour of the water bag being presented if there is no sign of progress.
For mature cows, allow two hours from passing the water bag if no progress has been made.
Don’t rush in to pull the calf. Check that the cow has opened properly.
There are times these rule of thumbs can be ignored.
For instance, when a calf is coming backwards, a cow is carrying twins, or when you do the first morning check and are unsure how long the cow has been in labour or last thing at night.
If cows are calving to a new stock bull for the first time, it can give peace of mind to step in and assist cows more than normal until confidence grows.
Check for normal presentation
When calving a cow, it is vital that you know what feels normal. First off, check that both front feet are forward and in the right position.
Legs coming backwards will need correcting and comes with experience. Check the calf’s head is forward and that the tongue is not swollen.
Pay attention to the colour of the fluids as the water bag is presented. Fluids should be clear or slightly yellow in colour. If fluids are red or brown, the calf is in difficulty and requires immediate delivery.
If you put your arm inside the cow and it starts to rotate, the animal’s uterus is probably twisted and veterinary intervention will be needed.
Making a call on big calves
As you check calf presentation, if the front legs are starting to cross over, this is a sign of a big calf and its shoulders are being squeezed in the pelvic canal.
This is the time to make the call for veterinary intervention, rather than taking a chance on pulling a big calf which gets stuck and dies.
Double-looping the calving ropes
When attaching the calving ropes, use a double loop method. The first loop should be above the fetlock and the second just below this joint. Two loops spreads the pressure being exerted on the calf’s leg as the jack is tensioned.
In the wrong hands, the jack increases the risk of an injured or dead calf, so it should only be used by an experienced operator. When using the jack, never stand between the ratchet bar and side wall.
As the cow pushes, stop ratcheting. Lever the bar downwards in a smooth motion. As the cow relaxes, raise the bar upwards and take up the slack.
If the calf gets stuck at the hips, release the pressure from the jack to let the calf breathe.
Re-apply lubricant and try to work one of the calf’s hips out by levering jack to one side.
Read more
Five essentials for every calving kit
Feeding cows in the evening to delay calving at night


SHARING OPTIONS