When erecting electric fencing, the main tools and materials you need are timber stakes, a post driver, a ratchet strainer, a level, hammer, gloves, insulators, egg insulators, staples, wire cutter and spinning jenny. Stephen Lynch, fencing operator from FRS says the quality of materials will affect the cost of work carried out but also the fence life expectancy. Where long-life PDM posts and 12-gauge high-tensile wire is used, farmers can expect a working life of 15 years for a new fence. This will shorten considerably when lower quality materials are used.
Once all the materials are sourced it is time to lay out the fence. Stephen usually positions the straining posts first. PDM 2.1m long strainer posts were used in this example. The post is about 5in in diameter. When the two straining posts are erected, it is time to erect the fence line. When erecting electric fencing, you must first tie the egg insulator to the straining post. Use a 2.5ft length of high-tensile wire when doing this. Tie this short length of wire near the top of the post. Wrap the wire around itself, all the while creating a special knot so the wire will not slip under pressure. To finish off this knot, twist the wire seven or eight times keeping the twists neat and tight. Excess wire at the end of the twists can be cut off. Next, put on the egg insulator. Tie the wire around the insulator creating a knot at the crossover of the egg so it won’t pull sideways when the wire is being strained later on.
Mount the main roll of high-tensile wire on the spinning jenny. The spinning jenny allows the operator to unroll wire easily along the fence line, reducing the chances of the wire knotting up during unrolling. When the wire is opened out, Stephen ties the beginning of the wire to an egg insulator which was mounted on the straining post earlier. At the other end, he places insultube insulators on the fence line. It is important to remember to put on the insulators at this stage. Stephen says if you forget to do this and finish off erecting the wire you would have to go back and cut the wire again to get them on which is counterproductive. The number of posts in a fence line will determine the number of insulators needed.
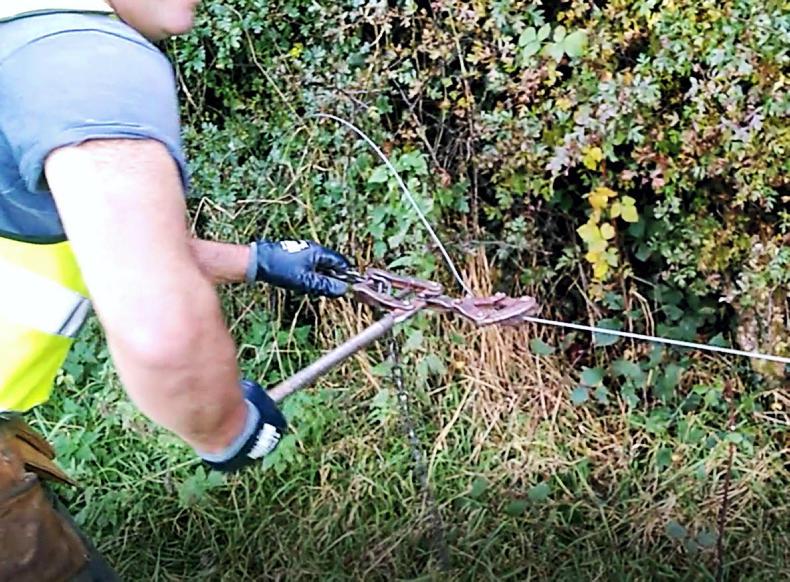
Now it is time to strain the wire. As mentioned in step three, the beginning of the wire was already tied to one straining post at one end of the fence line. At the other end of the fence line Stephen uses a ratchet strainer to strain the wire. This involves tying the chain from the strainer around the end post. He also connects the clamp from the monkey strainer to the wire. Once the clamp and the chain are connected, a ratchet system allows the wire to be pulled nice and tight. The loose wire at the end between the clamp and the post is now tied and strained by hand to the egg insulator. Once tied the ratchet strainer can be taken off.
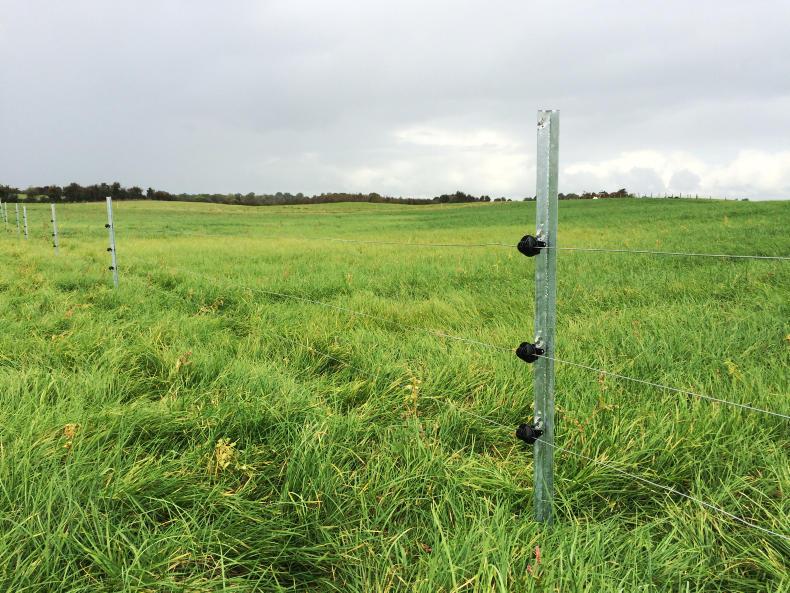
With the fence line and end posts erected, the intermediate posts can be driven. Normally a heavier strainer post is used at the start of a fence line and lighter intermediate posts are used thereafter spaced about 12 metres apart. Stephen says the fence line will act as a guide for positioning the intermediate posts. Where there is a turn in a fence line, a turner post should really be used. If the turns are significant in a fence line, the fence should be strained in separate sections with straining posts. All posts are driven with a post driver. Once the posts are driven the insulators on the fence can be stapled to the posts. Now it is just a matter of adding power to the line.
Cost
Pat Clarke, fencing manager from FRS in Ballyjamesduff, says that a typical paddock fencing job would cost in the region of €1.50/m excluding VAT supplied and fitted by FRS. Typical cost of materials including VAT:
7ft 5-7in PDM post: €217ft 4-5in PDM turners: €13.505ft 4-5in PDM intermediate post: €7.2512g HT wire 650m: €55.00Egg Insulator: €1 eachPel Ip33 insulators (100): €185kg staples: €20
When erecting electric fencing, the main tools and materials you need are timber stakes, a post driver, a ratchet strainer, a level, hammer, gloves, insulators, egg insulators, staples, wire cutter and spinning jenny. Stephen Lynch, fencing operator from FRS says the quality of materials will affect the cost of work carried out but also the fence life expectancy. Where long-life PDM posts and 12-gauge high-tensile wire is used, farmers can expect a working life of 15 years for a new fence. This will shorten considerably when lower quality materials are used.
Once all the materials are sourced it is time to lay out the fence. Stephen usually positions the straining posts first. PDM 2.1m long strainer posts were used in this example. The post is about 5in in diameter. When the two straining posts are erected, it is time to erect the fence line. When erecting electric fencing, you must first tie the egg insulator to the straining post. Use a 2.5ft length of high-tensile wire when doing this. Tie this short length of wire near the top of the post. Wrap the wire around itself, all the while creating a special knot so the wire will not slip under pressure. To finish off this knot, twist the wire seven or eight times keeping the twists neat and tight. Excess wire at the end of the twists can be cut off. Next, put on the egg insulator. Tie the wire around the insulator creating a knot at the crossover of the egg so it won’t pull sideways when the wire is being strained later on.
Mount the main roll of high-tensile wire on the spinning jenny. The spinning jenny allows the operator to unroll wire easily along the fence line, reducing the chances of the wire knotting up during unrolling. When the wire is opened out, Stephen ties the beginning of the wire to an egg insulator which was mounted on the straining post earlier. At the other end, he places insultube insulators on the fence line. It is important to remember to put on the insulators at this stage. Stephen says if you forget to do this and finish off erecting the wire you would have to go back and cut the wire again to get them on which is counterproductive. The number of posts in a fence line will determine the number of insulators needed.
Now it is time to strain the wire. As mentioned in step three, the beginning of the wire was already tied to one straining post at one end of the fence line. At the other end of the fence line Stephen uses a ratchet strainer to strain the wire. This involves tying the chain from the strainer around the end post. He also connects the clamp from the monkey strainer to the wire. Once the clamp and the chain are connected, a ratchet system allows the wire to be pulled nice and tight. The loose wire at the end between the clamp and the post is now tied and strained by hand to the egg insulator. Once tied the ratchet strainer can be taken off.
With the fence line and end posts erected, the intermediate posts can be driven. Normally a heavier strainer post is used at the start of a fence line and lighter intermediate posts are used thereafter spaced about 12 metres apart. Stephen says the fence line will act as a guide for positioning the intermediate posts. Where there is a turn in a fence line, a turner post should really be used. If the turns are significant in a fence line, the fence should be strained in separate sections with straining posts. All posts are driven with a post driver. Once the posts are driven the insulators on the fence can be stapled to the posts. Now it is just a matter of adding power to the line.
Cost
Pat Clarke, fencing manager from FRS in Ballyjamesduff, says that a typical paddock fencing job would cost in the region of €1.50/m excluding VAT supplied and fitted by FRS. Typical cost of materials including VAT:
7ft 5-7in PDM post: €217ft 4-5in PDM turners: €13.505ft 4-5in PDM intermediate post: €7.2512g HT wire 650m: €55.00Egg Insulator: €1 eachPel Ip33 insulators (100): €185kg staples: €20 


SHARING OPTIONS