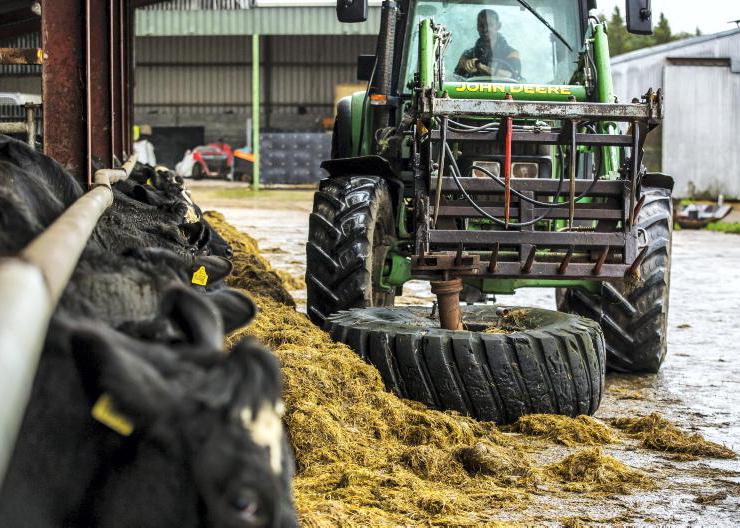
With ground and growing conditions holding up well across the country, attention may be turned away from preparing all the all-important winter feed equipment.
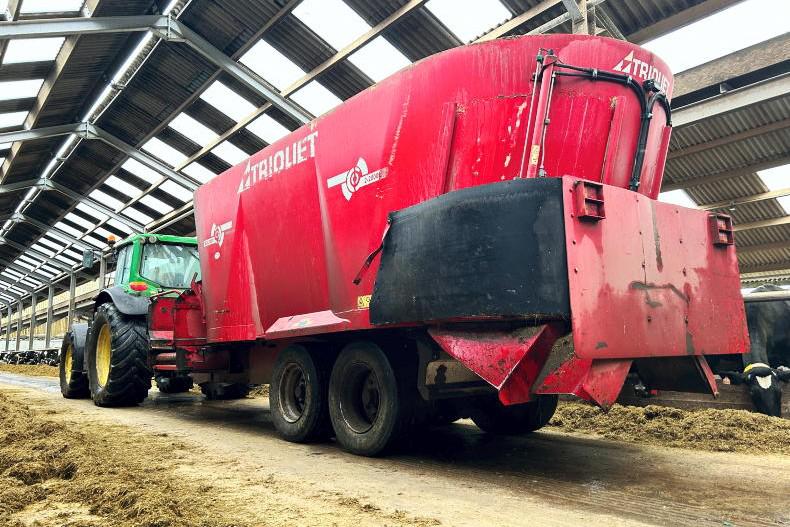
The diet feeder is one of the complicated yet essential machines needed over the winter feeding period. It is important that it is correctly serviced and checked before duty calls. Now is the time to get it done. Before any maintenance takes place, it is good practice to wash the feeder for two reasons. Firstly, the cleanliness of the job and second, so that any cracks or wear can be easily seen. Before work begins, out of the interest of safety it is advised to remove the feeder from the tractor.
Gearbox
The main gearbox on any tub feeder is the auger gearbox. Ideally, oil in the auger box should be changed every 500 hours or at the start each season.
The first step is to drain the gearbox by opening the hydraulic hose on its underside. But before this, ensure you have the recommended replacement oil.
Although 80% of gearboxes use 85 W140 oil, check with your dealer or manufacturer and ask the required volume in litres to prevent over- or under-filling.
Examine the condition of the used oil, looking out for metal filings which ideally there should be none of. Metal filings would indicate an internal gear problem which will require specialist attention, ie reconditioning.
Collect the waste oil and dispose of accordingly. Once the gearbox has been left to drain, completely reattach the hose.
Gearbox oil should be replaced by pumping it into the bottom of the reservoir located at the front of the machine. This will take 90% of the oil; the remaining 10% will be topped up using the reservoir.
If the feeder is fitted with a two-speed gearbox, it is recommended that this oil is also replaced every season or 500 hours.
All gearbox oil levels should be checked throughout the season through the site glasses.
Knives and wear
Blunt knives will make the machine harder to drive but also slower to mix and will result in burning excess diesel.
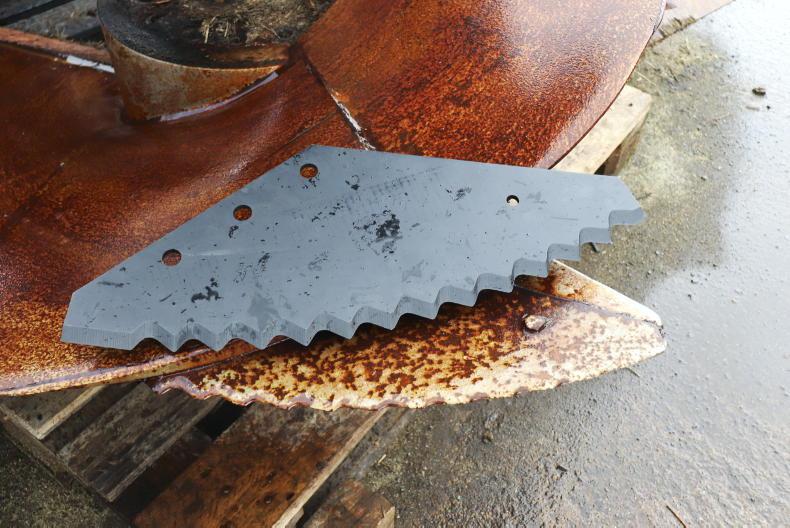
Knife condition should be checked regular and replaced if worn. Blunt knifes will leave the feeder harder to drive, slower to mix and result in increased auger wear and fuel usage. If replacing knives, new bolts should be fitted. Depending on knife quality and type buyer prices can range from €35 to €50 each plus VAT. It is recommended to spend that bit extra and fit good quality hardened knives.
Inspect the tub side walls, auger and sweeper arms for wear. Pay close attention to these areas as they tend to be the main contact points for forage over the course of a feeder’s working life.
Any signs of sharp blade-like metal edges indicates considerable wear. If spotted and acted on in time, the auger can be generally reinforced with wear strips. As a general rule of thumb an auger should last a farmer feeding 150 cows in the region of 10 seasons.
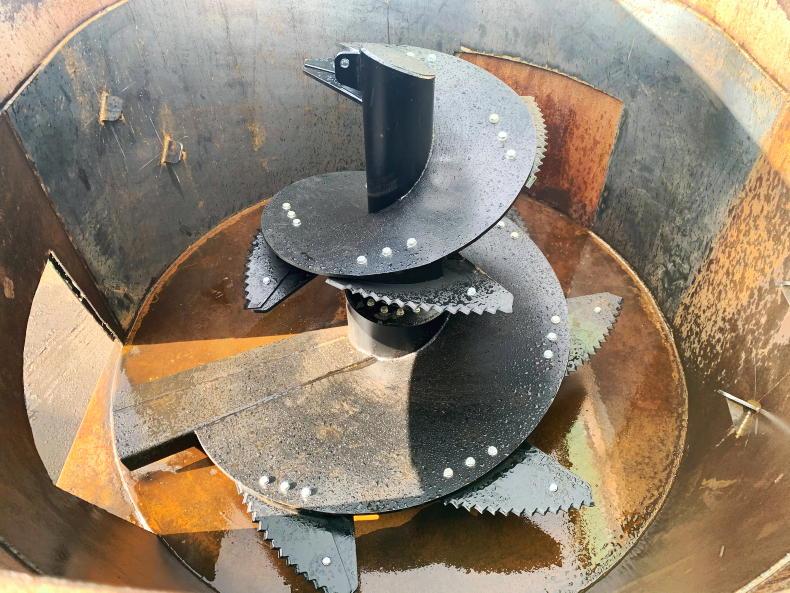
A new auger and blades will cost in the region of €1,800 to €2,000 plus VAT.
A complete new auger will cost in the region of €1,800 to €2,000 plus VAT. Two Irish manufacturers that special is auger reconditioning and repair is Desmond Condell Engineering and Rotospiral, both based in Co Kilkenny.
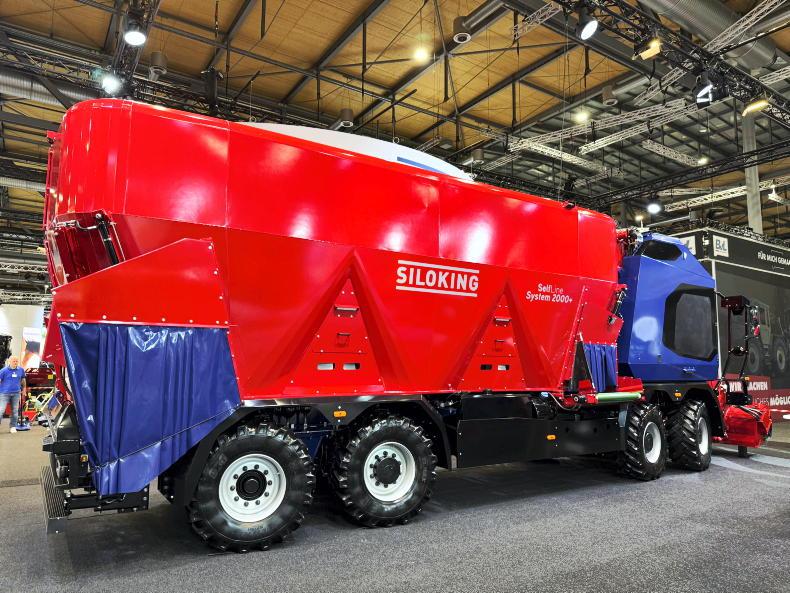
Discharge doors and belts
Depending on the individual diet feeder, the number of doors can vary. Some may have as many as five.
Other feeders like the Redrock photographed may have a central door and conveyor belt system, leaving it possible to feed out at either side.
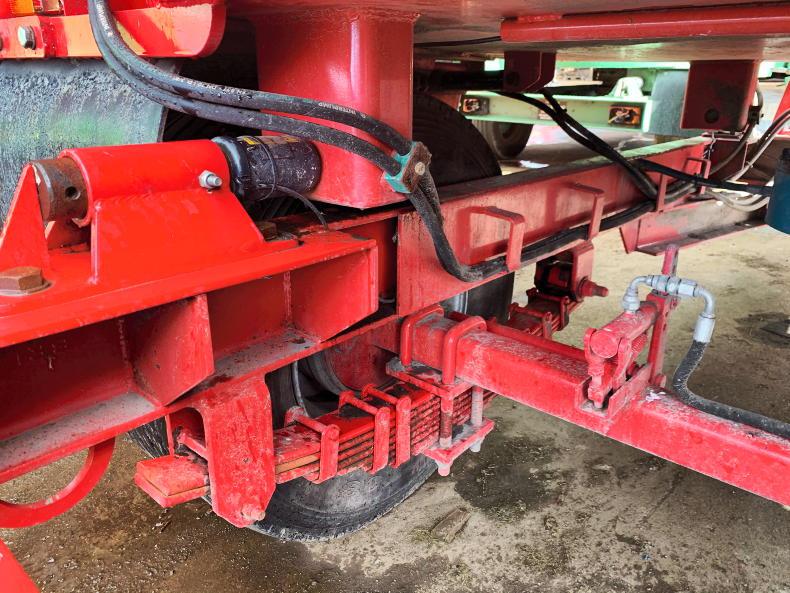
Discharge doors tend to be subjected to quite a bit of abuse over the season. Start by checking that the door itself is in good condition and not bent or damaged.
Many feeder doors slide within a track or profile. Make sure this track is well lubricated on either side with grease. The feeder tray and the rubber between it and the feeder body should be checked for damage. Needless to say, either should be replaced if damaged.
Machines with belt conveyors should have bearings and belt tension checked. Any perished hoses driving the hydraulic motors should be replaced.
The hydraulic rams that open and close doors should be checked to ensure that seals or fittings/hoses are not leaking oil or badly perished.
Often, ram pistons on doors that tend not to be used can corrode and when next used the corrosion can damage oil seals.
Tyres, axle and brakes
The condition of the axle, springs and brake should all be checked.
Check the chassis and axle for cracks or damage and that leaf springs if fitted are still intact and U-bolts are tight. Springs are a worthwhile option because they absorb impact during loading and prevent the risk of the chassis or axle cracking over time from sudden impact.
A tandem-axle machine will have more moving parts and therefore will need to be greased on a regular basis.
Assess tyre pressure and wheel condition. For complete peace of mind it is worth opening the wheel hubs and making an adjustment on the wheel bearing if necessary.
While around that general area, inspect the brakes. Two people are required for this. The ram should be closed when there is no force applied to the brake pedal.
When force is applied, there should be approximately 3in to 4in of travel on the ram. At this point, the slack adjusters should be tightened.
Towing eye and chassis
Check the condition of the towing eye especially on older machines and replace if necessary. If it’s a bolt-on towing eye, ensure bolts are tightened to the correct torque.
If the worn towing eye is the weld on type then it will need cutting off and a new one welded back on in its place.
A good weld is critical. It is worth having a professional carry out this procedure if you don’t feel entirely up to the job.
Weigh cells
If weigh cells are fitted they should be calibrated or checked that they are measuring accurately.
The easiest way of doing this is to place a known weight in each corner of the machine separately.
An accurate reading should be provided for each time. Ensure all electrics are intact and kept dry.
PTO
Last but certainly not least is the PTO shaft. Remove the shaft(s) from the feeder and separate the sliding profile, checking for bends. Inspect the locking pins on either end for wear also. Before reassembling, grease the profiles and the crosses.
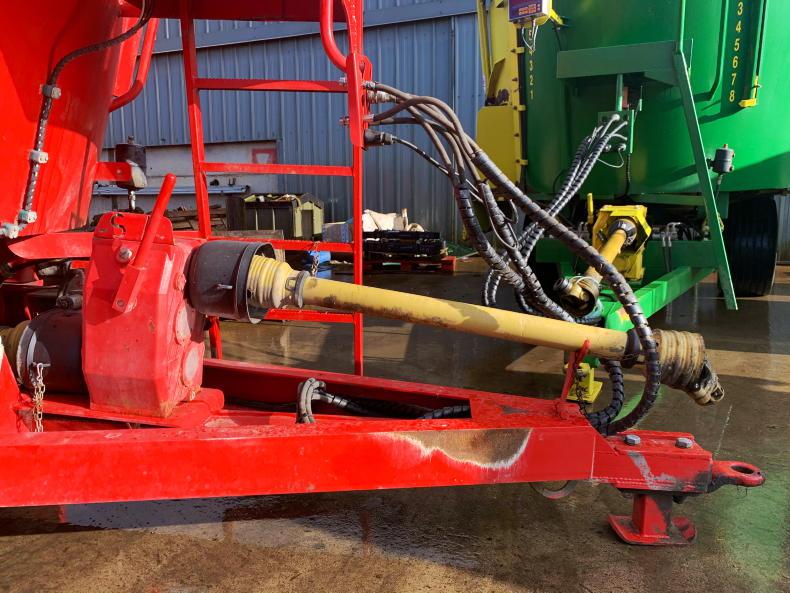
Every machine should be fitted with a fully functional PTO cover.
It is critical that all PTO covers and guards are fitted and fully functional.
Replacement covers can be expensive and it may work out cheaper to replace the entire shaft.
Machines fitted with a two-speed gearbox will subsequently be fitted with two block bearings. Check these bearings for play and grease accordingly.
General
Ensure all lights are functional regardless if the machine never leaves the farmyard. Often lights can get broken or damaged.
In this case, buy a set of LED lights and replace them. The majority of lighting issues stem from corrosion or a loose connection within the seven-pin plug. If this is not the problem then it’s going to be a blown bulb or a damaged wire somewhere in the machine.
Check that the handbrake and breakaway cable function properly if fitted. The best advice is to have the right approach when it comes to maintaining a machine. Farmers who keep on top of machine maintenance and deal with issues such as wear on time will generally tend to have lower running costs.
It is good practice to routinely make a point of checking over and greasing all required locations on the diet feeder throughout the feeding season for maximum reliability.
With ground and growing conditions holding up well across the country, attention may be turned away from preparing all the all-important winter feed equipment.
The diet feeder is one of the complicated yet essential machines needed over the winter feeding period. It is important that it is correctly serviced and checked before duty calls. Now is the time to get it done. Before any maintenance takes place, it is good practice to wash the feeder for two reasons. Firstly, the cleanliness of the job and second, so that any cracks or wear can be easily seen. Before work begins, out of the interest of safety it is advised to remove the feeder from the tractor.
Gearbox
The main gearbox on any tub feeder is the auger gearbox. Ideally, oil in the auger box should be changed every 500 hours or at the start each season.
The first step is to drain the gearbox by opening the hydraulic hose on its underside. But before this, ensure you have the recommended replacement oil.
Although 80% of gearboxes use 85 W140 oil, check with your dealer or manufacturer and ask the required volume in litres to prevent over- or under-filling.
Examine the condition of the used oil, looking out for metal filings which ideally there should be none of. Metal filings would indicate an internal gear problem which will require specialist attention, ie reconditioning.
Collect the waste oil and dispose of accordingly. Once the gearbox has been left to drain, completely reattach the hose.
Gearbox oil should be replaced by pumping it into the bottom of the reservoir located at the front of the machine. This will take 90% of the oil; the remaining 10% will be topped up using the reservoir.
If the feeder is fitted with a two-speed gearbox, it is recommended that this oil is also replaced every season or 500 hours.
All gearbox oil levels should be checked throughout the season through the site glasses.
Knives and wear
Blunt knives will make the machine harder to drive but also slower to mix and will result in burning excess diesel.
Knife condition should be checked regular and replaced if worn. Blunt knifes will leave the feeder harder to drive, slower to mix and result in increased auger wear and fuel usage. If replacing knives, new bolts should be fitted. Depending on knife quality and type buyer prices can range from €35 to €50 each plus VAT. It is recommended to spend that bit extra and fit good quality hardened knives.
Inspect the tub side walls, auger and sweeper arms for wear. Pay close attention to these areas as they tend to be the main contact points for forage over the course of a feeder’s working life.
Any signs of sharp blade-like metal edges indicates considerable wear. If spotted and acted on in time, the auger can be generally reinforced with wear strips. As a general rule of thumb an auger should last a farmer feeding 150 cows in the region of 10 seasons.
A new auger and blades will cost in the region of €1,800 to €2,000 plus VAT.
A complete new auger will cost in the region of €1,800 to €2,000 plus VAT. Two Irish manufacturers that special is auger reconditioning and repair is Desmond Condell Engineering and Rotospiral, both based in Co Kilkenny.
Discharge doors and belts
Depending on the individual diet feeder, the number of doors can vary. Some may have as many as five.
Other feeders like the Redrock photographed may have a central door and conveyor belt system, leaving it possible to feed out at either side.
Discharge doors tend to be subjected to quite a bit of abuse over the season. Start by checking that the door itself is in good condition and not bent or damaged.
Many feeder doors slide within a track or profile. Make sure this track is well lubricated on either side with grease. The feeder tray and the rubber between it and the feeder body should be checked for damage. Needless to say, either should be replaced if damaged.
Machines with belt conveyors should have bearings and belt tension checked. Any perished hoses driving the hydraulic motors should be replaced.
The hydraulic rams that open and close doors should be checked to ensure that seals or fittings/hoses are not leaking oil or badly perished.
Often, ram pistons on doors that tend not to be used can corrode and when next used the corrosion can damage oil seals.
Tyres, axle and brakes
The condition of the axle, springs and brake should all be checked.
Check the chassis and axle for cracks or damage and that leaf springs if fitted are still intact and U-bolts are tight. Springs are a worthwhile option because they absorb impact during loading and prevent the risk of the chassis or axle cracking over time from sudden impact.
A tandem-axle machine will have more moving parts and therefore will need to be greased on a regular basis.
Assess tyre pressure and wheel condition. For complete peace of mind it is worth opening the wheel hubs and making an adjustment on the wheel bearing if necessary.
While around that general area, inspect the brakes. Two people are required for this. The ram should be closed when there is no force applied to the brake pedal.
When force is applied, there should be approximately 3in to 4in of travel on the ram. At this point, the slack adjusters should be tightened.
Towing eye and chassis
Check the condition of the towing eye especially on older machines and replace if necessary. If it’s a bolt-on towing eye, ensure bolts are tightened to the correct torque.
If the worn towing eye is the weld on type then it will need cutting off and a new one welded back on in its place.
A good weld is critical. It is worth having a professional carry out this procedure if you don’t feel entirely up to the job.
Weigh cells
If weigh cells are fitted they should be calibrated or checked that they are measuring accurately.
The easiest way of doing this is to place a known weight in each corner of the machine separately.
An accurate reading should be provided for each time. Ensure all electrics are intact and kept dry.
PTO
Last but certainly not least is the PTO shaft. Remove the shaft(s) from the feeder and separate the sliding profile, checking for bends. Inspect the locking pins on either end for wear also. Before reassembling, grease the profiles and the crosses.
Every machine should be fitted with a fully functional PTO cover.
It is critical that all PTO covers and guards are fitted and fully functional.
Replacement covers can be expensive and it may work out cheaper to replace the entire shaft.
Machines fitted with a two-speed gearbox will subsequently be fitted with two block bearings. Check these bearings for play and grease accordingly.
General
Ensure all lights are functional regardless if the machine never leaves the farmyard. Often lights can get broken or damaged.
In this case, buy a set of LED lights and replace them. The majority of lighting issues stem from corrosion or a loose connection within the seven-pin plug. If this is not the problem then it’s going to be a blown bulb or a damaged wire somewhere in the machine.
Check that the handbrake and breakaway cable function properly if fitted. The best advice is to have the right approach when it comes to maintaining a machine. Farmers who keep on top of machine maintenance and deal with issues such as wear on time will generally tend to have lower running costs.
It is good practice to routinely make a point of checking over and greasing all required locations on the diet feeder throughout the feeding season for maximum reliability.


SHARING OPTIONS