Following the conflict in the Middle East, fertiliser and oil prices have soared over the past three weeks.
With that in mind, it is vital that farmers and contractors take the time to correctly set up the fertiliser spreader this spring.
When it comes to spreading fertiliser, setting up the mechanical aspect of the machine is important, but understanding the product you are about to spread and its characteristics is equally so.
The spreader’s settings are determined by the physical properties of the fertiliser, which is the particle size distribution, the bulk density and the flow rate, all of which influence the spreader’s calibration settings.
Different types of fertiliser, or even the same fertiliser from different batches or production plants, often require different settings.
With the broadcast application of unprotected urea products now banned, farmers have no choice but to spread protected urea.
For those not used to spreading urea or that have had issues previously, it’s important to understand that its characteristics are different to those of CAN and other NPK fertilisers.
Differing densities
Granule density represents the mass to volume ratio of granules. This is a measure of the physical weight of one litre of fertiliser measured by a weighing scale.
Urea is a low-density fertiliser with a granule density of 0.75kg/l, compared to CAN (27%) with a higher density of 1kg/l. This is why the same size bulk bags are 375kg and not 500kg.
This difference in density will impact spreading width and, as result, the overall spread pattern if not accounted for.
The best analogy is to think of every granule/prill of CAN or NPK as a golf ball and the protected urea granules/prills as a ping-pong balls – size is roughly the same but the weight is much different.
Therefore, when you throw the golf ball and ping-pong ball with the same degree of force, the golf ball will travel a much further distance. In order to throw the ping-pong ball (protected urea in this case) the same distance, adjustments need to be made in how it is thrown, ie spreader settings need to be adjusted.
Getting the basics right
The first thing to do before attaching the spreader is to measure that both drop arms on the tractor are the same length.
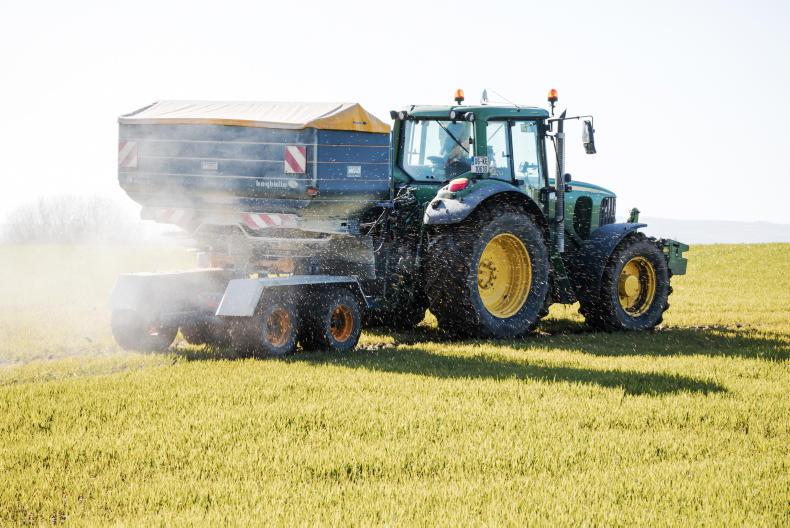
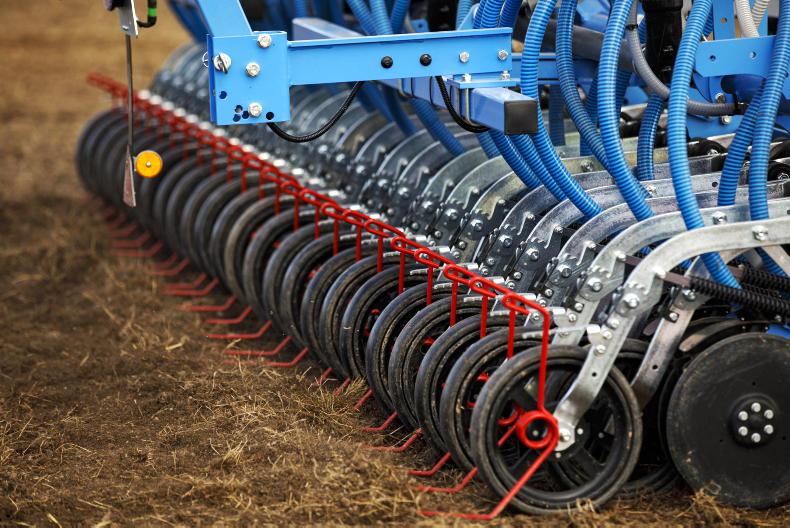
The spreader’s settings are determined by the physical properties of the fertiliser. \ Odhran Ducie
Check that the pressure in both rear tyres is equal. An unlevel spreader will have an effect on the spread pattern.
Once mounted, ensure both stabilisers are tight, allowing no lateral movement.
Ensure that the spreader is centrally mounted. Once this is complete, raise the spreader to the correct working height.
The general rule of thumb is to have a distance of 75cm from the top of the crop to the spreading mechanism. Next, adjust the toplink to the angle advised by either the spread chart or manufacturer.
Vane and discs
Like any machine, good mechanical order goes a long way in ensuring good performance. Start by checking the condition of the spreading vanes and discs. Vane wear is usually seen as waves or holes. Any issue here will have a big effect on the spreader’s performance. What may look like a small wave or ripples on the surface will have an increasingly negative effect on the spread pattern the wider the working width. Check for wobbles in the discs and agitators, as bearings can wear out over time and also have a negative effect on the spread pattern.
It is very important to select vane position based on the product intended to be applied. Depending on the manufacturer and spreader model, vane position may go unchanged when switching between NPK, or CAN-based fertilisers. However, it should not be assumed that this is the same for urea-based products.
Settings for urea products will generally differ based on bulk density differences. Most manufacturers offer a calibration/spread chart app for modern machines. These apps are easily used and require the following criteria: application rate, product type, flow rate, spreading width, forward speed, etc.
It will then indicate the specific vane position, shutter/regulator position, PTO speed and, in some cases, fertiliser drop point and hopper angle for the specific product application.
These settings are based on tests under ideal conditions in test halls and give information on how to set the spreader for optimum even spreading at the desired application rate (kg/ha) and at a specific working width.
Flow rate
It’s vital to check the flow rate of the fertiliser. Different fertilisers will naturally flow at different rates, so the shutter position for 125kg/ha of urea will be different to the shutter position for 125kg/ha of CAN. The flow rate of specific fertiliser will vary between brands, batches as well as weather conditions, so it’s important to establish the flow rate for the specific product being spread on the day.
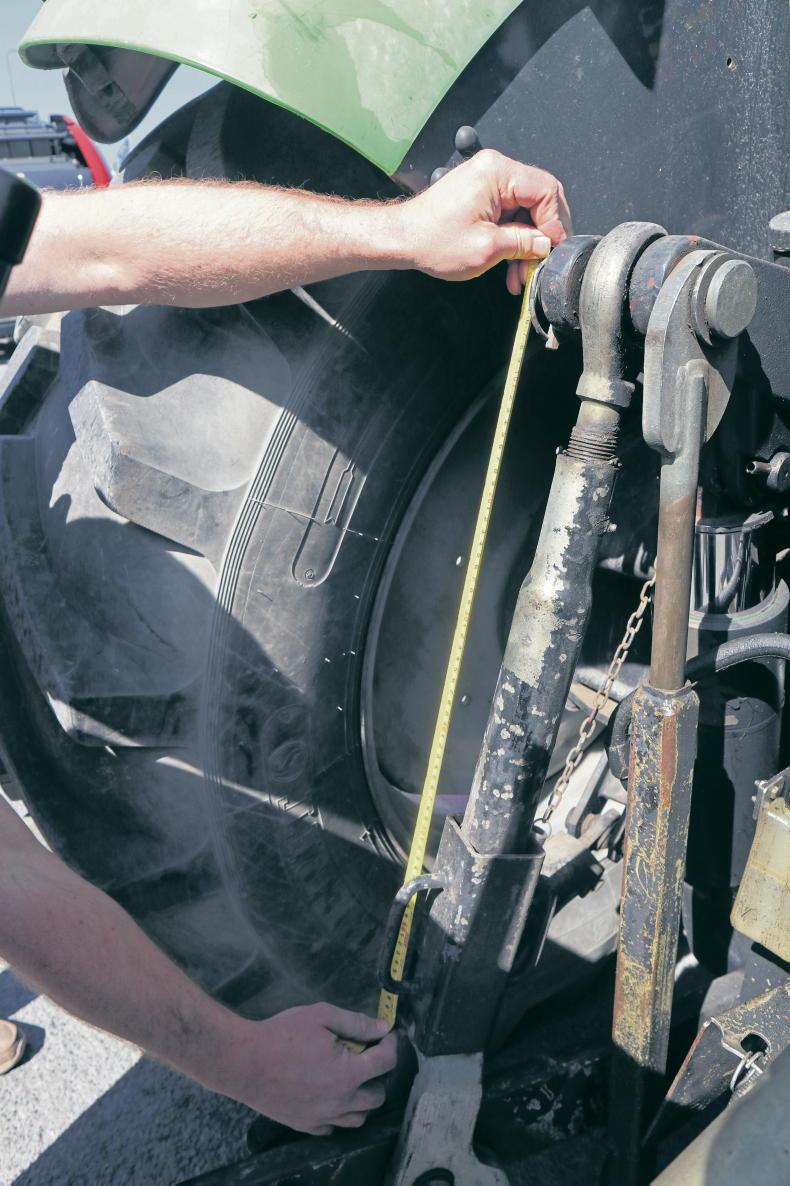
Rear tyre pressures and rear drop arm lengths should be equal.
This is done by removing one of the discs and placing a bucket under the shutter outlet.
Run the tractor PTO, then open the shutter for 30 seconds and collect the fertiliser in the bucket. Check the amount collected against the fertiliser spreader app for your spreader.
If there is no app for your spreader, you can use the Teagasc online calculator to work out how much fertiliser should have been collected. Adjust the shutter position until the correct amount is reached.
Wagtail spreader
Wagtail spreaders require no further setting up once mounted correctly and the flow rate has been established. This is done using the regulator, and again depends on the working width (m), application rate (kg/ha), forward speed (km/h) and type of fertiliser being applied.
Again, most manufacturers have apps that allow you to input these variables along with the fertiliser type. The app will then provide you with a setting or spread chart to suit the fertiliser being used, granular or prilled, etc.
The calibration procedure for a wagtail is almost the same to that of a disc machine.
You remove the spout and fit on a calibration container. The app or spread chart will provide a rate in kg/minute, which should match that coming from the spreader.
Run the spreader at the setting recommended by the app or spread chart and then weigh the fertiliser that comes out over the course of the minute. If the two figures don’t match, some fine-tuning may be required.
Application accuracy
Unless using a GPS of some kind, application accuracy will depend on the operator.
Many farmers will apply fertiliser with a wagtail more accurately that with a twin disc machine. When using a wagtail spreader with a typical working width in the region of 10-12m, it’s easier to maintain an accurate bout width by eye. Working with wider bout widths such as 18-24m or in a recently cut field makes it much more difficult to maintain accuracy. A basic GPS will help to cut out overlapping and reduce fertiliser usage.
Tray testing
The final step to perfecting the spreading process is to carry out a tray test. It’s great practice to set up the machine up to manufacturer’s requirements, based on the variables inputted.
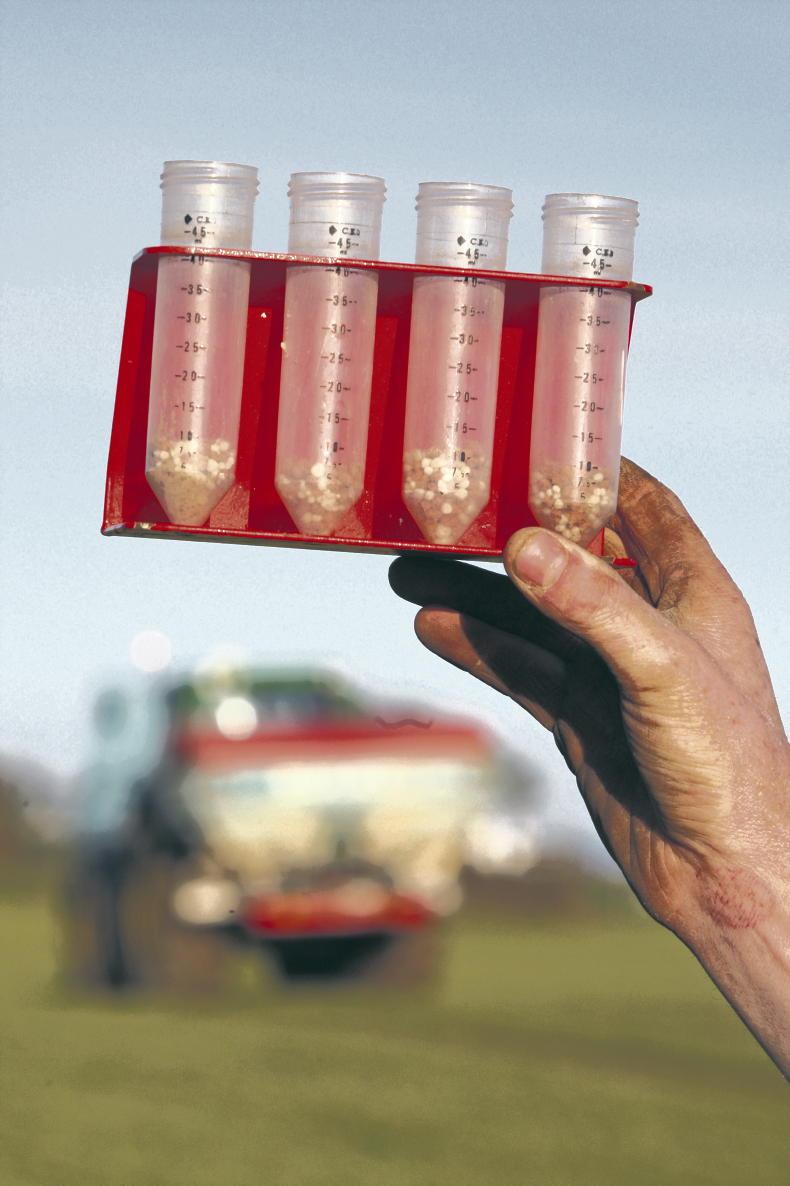
A simple tray test is the best way to determine spreader accuracy.
However, in order to prove the setup procedure is accurate, a tray test would ideally be carried out in the field. To do so, set out the trays at equal distance across the full bout width. Run the spreader over the trays in three passes, far left, centre and far right to ensure full spread pattern is recorded. Then, collect fertiliser in measuring cylinders and compare.
Following the conflict in the Middle East, fertiliser and oil prices have soared over the past three weeks.
With that in mind, it is vital that farmers and contractors take the time to correctly set up the fertiliser spreader this spring.
When it comes to spreading fertiliser, setting up the mechanical aspect of the machine is important, but understanding the product you are about to spread and its characteristics is equally so.
The spreader’s settings are determined by the physical properties of the fertiliser, which is the particle size distribution, the bulk density and the flow rate, all of which influence the spreader’s calibration settings.
Different types of fertiliser, or even the same fertiliser from different batches or production plants, often require different settings.
With the broadcast application of unprotected urea products now banned, farmers have no choice but to spread protected urea.
For those not used to spreading urea or that have had issues previously, it’s important to understand that its characteristics are different to those of CAN and other NPK fertilisers.
Differing densities
Granule density represents the mass to volume ratio of granules. This is a measure of the physical weight of one litre of fertiliser measured by a weighing scale.
Urea is a low-density fertiliser with a granule density of 0.75kg/l, compared to CAN (27%) with a higher density of 1kg/l. This is why the same size bulk bags are 375kg and not 500kg.
This difference in density will impact spreading width and, as result, the overall spread pattern if not accounted for.
The best analogy is to think of every granule/prill of CAN or NPK as a golf ball and the protected urea granules/prills as a ping-pong balls – size is roughly the same but the weight is much different.
Therefore, when you throw the golf ball and ping-pong ball with the same degree of force, the golf ball will travel a much further distance. In order to throw the ping-pong ball (protected urea in this case) the same distance, adjustments need to be made in how it is thrown, ie spreader settings need to be adjusted.
Getting the basics right
The first thing to do before attaching the spreader is to measure that both drop arms on the tractor are the same length.
The spreader’s settings are determined by the physical properties of the fertiliser. \ Odhran Ducie
Check that the pressure in both rear tyres is equal. An unlevel spreader will have an effect on the spread pattern.
Once mounted, ensure both stabilisers are tight, allowing no lateral movement.
Ensure that the spreader is centrally mounted. Once this is complete, raise the spreader to the correct working height.
The general rule of thumb is to have a distance of 75cm from the top of the crop to the spreading mechanism. Next, adjust the toplink to the angle advised by either the spread chart or manufacturer.
Vane and discs
Like any machine, good mechanical order goes a long way in ensuring good performance. Start by checking the condition of the spreading vanes and discs. Vane wear is usually seen as waves or holes. Any issue here will have a big effect on the spreader’s performance. What may look like a small wave or ripples on the surface will have an increasingly negative effect on the spread pattern the wider the working width. Check for wobbles in the discs and agitators, as bearings can wear out over time and also have a negative effect on the spread pattern.
It is very important to select vane position based on the product intended to be applied. Depending on the manufacturer and spreader model, vane position may go unchanged when switching between NPK, or CAN-based fertilisers. However, it should not be assumed that this is the same for urea-based products.
Settings for urea products will generally differ based on bulk density differences. Most manufacturers offer a calibration/spread chart app for modern machines. These apps are easily used and require the following criteria: application rate, product type, flow rate, spreading width, forward speed, etc.
It will then indicate the specific vane position, shutter/regulator position, PTO speed and, in some cases, fertiliser drop point and hopper angle for the specific product application.
These settings are based on tests under ideal conditions in test halls and give information on how to set the spreader for optimum even spreading at the desired application rate (kg/ha) and at a specific working width.
Flow rate
It’s vital to check the flow rate of the fertiliser. Different fertilisers will naturally flow at different rates, so the shutter position for 125kg/ha of urea will be different to the shutter position for 125kg/ha of CAN. The flow rate of specific fertiliser will vary between brands, batches as well as weather conditions, so it’s important to establish the flow rate for the specific product being spread on the day.
Rear tyre pressures and rear drop arm lengths should be equal.
This is done by removing one of the discs and placing a bucket under the shutter outlet.
Run the tractor PTO, then open the shutter for 30 seconds and collect the fertiliser in the bucket. Check the amount collected against the fertiliser spreader app for your spreader.
If there is no app for your spreader, you can use the Teagasc online calculator to work out how much fertiliser should have been collected. Adjust the shutter position until the correct amount is reached.
Wagtail spreader
Wagtail spreaders require no further setting up once mounted correctly and the flow rate has been established. This is done using the regulator, and again depends on the working width (m), application rate (kg/ha), forward speed (km/h) and type of fertiliser being applied.
Again, most manufacturers have apps that allow you to input these variables along with the fertiliser type. The app will then provide you with a setting or spread chart to suit the fertiliser being used, granular or prilled, etc.
The calibration procedure for a wagtail is almost the same to that of a disc machine.
You remove the spout and fit on a calibration container. The app or spread chart will provide a rate in kg/minute, which should match that coming from the spreader.
Run the spreader at the setting recommended by the app or spread chart and then weigh the fertiliser that comes out over the course of the minute. If the two figures don’t match, some fine-tuning may be required.
Application accuracy
Unless using a GPS of some kind, application accuracy will depend on the operator.
Many farmers will apply fertiliser with a wagtail more accurately that with a twin disc machine. When using a wagtail spreader with a typical working width in the region of 10-12m, it’s easier to maintain an accurate bout width by eye. Working with wider bout widths such as 18-24m or in a recently cut field makes it much more difficult to maintain accuracy. A basic GPS will help to cut out overlapping and reduce fertiliser usage.
Tray testing
The final step to perfecting the spreading process is to carry out a tray test. It’s great practice to set up the machine up to manufacturer’s requirements, based on the variables inputted.
A simple tray test is the best way to determine spreader accuracy.
However, in order to prove the setup procedure is accurate, a tray test would ideally be carried out in the field. To do so, set out the trays at equal distance across the full bout width. Run the spreader over the trays in three passes, far left, centre and far right to ensure full spread pattern is recorded. Then, collect fertiliser in measuring cylinders and compare.


SHARING OPTIONS