This is one of my favourite tricks. Carbon paper makes it really easy to transfer words and images on to the surface of your furniture – it’s foolproof and saves so much time, like painting by numbers. Here, I created a simple typographic design with a drop shadow in a contrasting colour. Before you begin, remove any existing handles and fill in the holes left behind using wood filler so that you have a flat surface to work on.

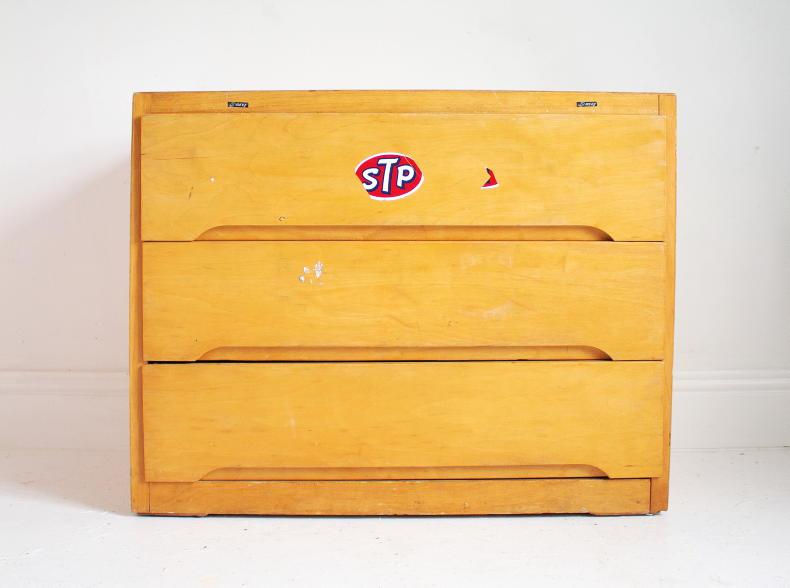
Just My Type: Before picture. \ Joanne Condon

Just My Type: The finished project. \ Joanne Condon
Materials
Screwdriver
Wood filler and scraper
Sanding block and electric sander
Clear, water-based varnish
Primer
Paintbrushes
Satinwood paints
Painter’s tape
Printed letters
Carbon paper
Pencil
Artist’s brushes
New handles (optional)
Drill and drill bit (optional)
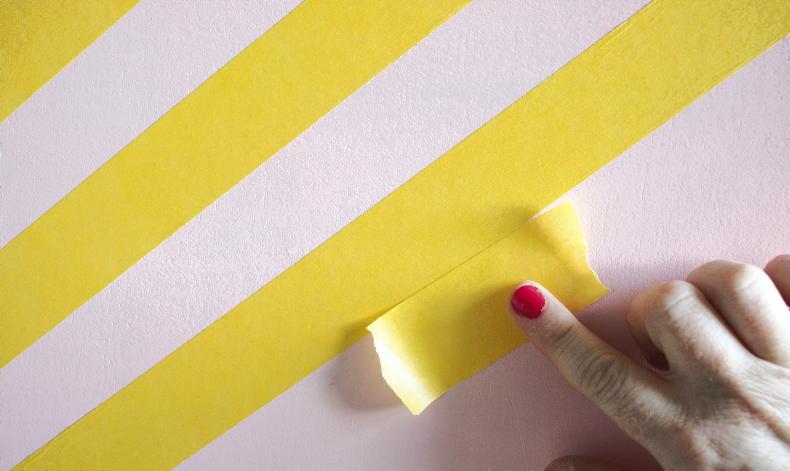
1 Sand the legs and add a coat of clear, water-based varnish, then leave to dry. Prepare and prime everything else and apply a base coat of paint. For the diagonal stripes, I used painter’s tape 5cm/2in wide. To keep the spacing even, I used a small piece of tape as a guide.

\ Joanne Condon
2 Make sure that the tape is secure and paint the diagonal lines in a contrasting colour. Add a second coat if you need to. Remove the tape as soon as you have full coverage and then wait for the paint to dry.

\ Joanne Condon
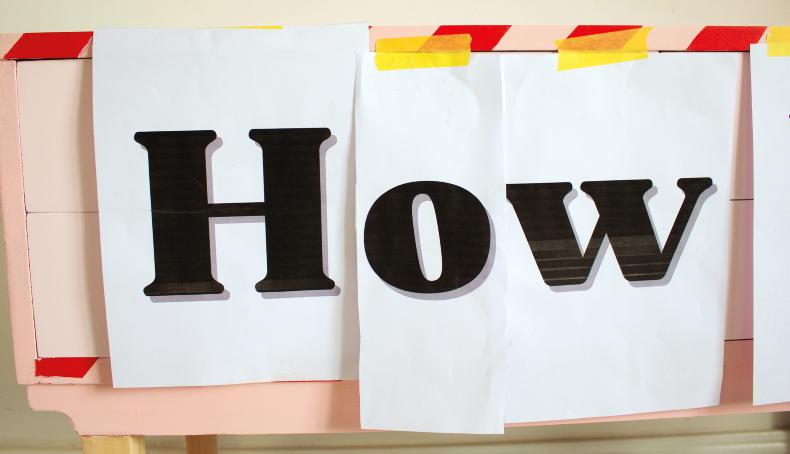
3 Your lettering should be printed out at full size – you may need several sheets of paper. I made sure to include the drop shadow. Tape each of the letters in position, making sure everything lines up correctly.

\ Joanne Condon
4 Place the carbon paper behind your first letter with the darker side facing the painted surface. With a sharp pencil, trace over the outline of the letter and its shadow.

\ Joanne Condon
5 The outline will be transferred onto the piece of furniture. Move the carbon paper to the next letter and repeat step four until you have traced the whole of your design.

\ Joanne Condon
6 Using an artist’s brush, paint the letters in your chosen colour. You may need to apply two coats. Leave to dry completely.

\ Joanne Condon
7 With a thinner brush, paint the drop shadow in a different colour. Again, you may need two coats. Leave to dry.

\ Joanne Condon
8 Touch up the edges of the letters with more paint as needed so that all the lines are neat and crisp. Leave to dry.

\ Joanne Condon
9 Paint around the edges of the letters using your base colour as well. This will take a little time, but it will make a big difference in the end. Leave to dry.

Joanne Condon
10 Finally, if you would like to add new handles or other hardware, you can do this now. I chose these small brass handles, which don’t compete with the lettering.

Furniture Flips by Joanne Condon, published by CICO Books (€19.95). Photography by Joanne Condon
This is one of my favourite tricks. Carbon paper makes it really easy to transfer words and images on to the surface of your furniture – it’s foolproof and saves so much time, like painting by numbers. Here, I created a simple typographic design with a drop shadow in a contrasting colour. Before you begin, remove any existing handles and fill in the holes left behind using wood filler so that you have a flat surface to work on.

Just My Type: Before picture. \ Joanne Condon

Just My Type: The finished project. \ Joanne Condon
Materials
Screwdriver
Wood filler and scraper
Sanding block and electric sander
Clear, water-based varnish
Primer
Paintbrushes
Satinwood paints
Painter’s tape
Printed letters
Carbon paper
Pencil
Artist’s brushes
New handles (optional)
Drill and drill bit (optional)
1 Sand the legs and add a coat of clear, water-based varnish, then leave to dry. Prepare and prime everything else and apply a base coat of paint. For the diagonal stripes, I used painter’s tape 5cm/2in wide. To keep the spacing even, I used a small piece of tape as a guide.

\ Joanne Condon
2 Make sure that the tape is secure and paint the diagonal lines in a contrasting colour. Add a second coat if you need to. Remove the tape as soon as you have full coverage and then wait for the paint to dry.

\ Joanne Condon
3 Your lettering should be printed out at full size – you may need several sheets of paper. I made sure to include the drop shadow. Tape each of the letters in position, making sure everything lines up correctly.

\ Joanne Condon
4 Place the carbon paper behind your first letter with the darker side facing the painted surface. With a sharp pencil, trace over the outline of the letter and its shadow.

\ Joanne Condon
5 The outline will be transferred onto the piece of furniture. Move the carbon paper to the next letter and repeat step four until you have traced the whole of your design.

\ Joanne Condon
6 Using an artist’s brush, paint the letters in your chosen colour. You may need to apply two coats. Leave to dry completely.

\ Joanne Condon
7 With a thinner brush, paint the drop shadow in a different colour. Again, you may need two coats. Leave to dry.

\ Joanne Condon
8 Touch up the edges of the letters with more paint as needed so that all the lines are neat and crisp. Leave to dry.

\ Joanne Condon
9 Paint around the edges of the letters using your base colour as well. This will take a little time, but it will make a big difference in the end. Leave to dry.

Joanne Condon
10 Finally, if you would like to add new handles or other hardware, you can do this now. I chose these small brass handles, which don’t compete with the lettering.

Furniture Flips by Joanne Condon, published by CICO Books (€19.95). Photography by Joanne Condon


SHARING OPTIONS