For many farmers, the move towards urea-based fertiliser products is one that is relatively new and one that came about when fertiliser prices hit record highs in 2022.
The main reason was the bang for buck that urea-based products offer per unit of nitrogen, compared to CAN.
Although the spreading season for chemical nitrogen and phosphorus ends within a month (14 September), the aim of this article is to emphasise the importance of spreader setup when spreading urea in order to achieve the best results.
Many farmers have questioned Teagasc’s latest update on protected urea performance, which outlined that there was no difference in grass growth between protected urea-based fertilisers and traditional can or urea fertilisers.
Since the findings have been published, a cohort of farmers have responded with conflicting results.
The truth of the matter is that some farmers may in fact be witnessing conflicting results to what Teagasc has observed.
However, in most cases, the product is not to blame but the way in which the spreader is set up is instead.
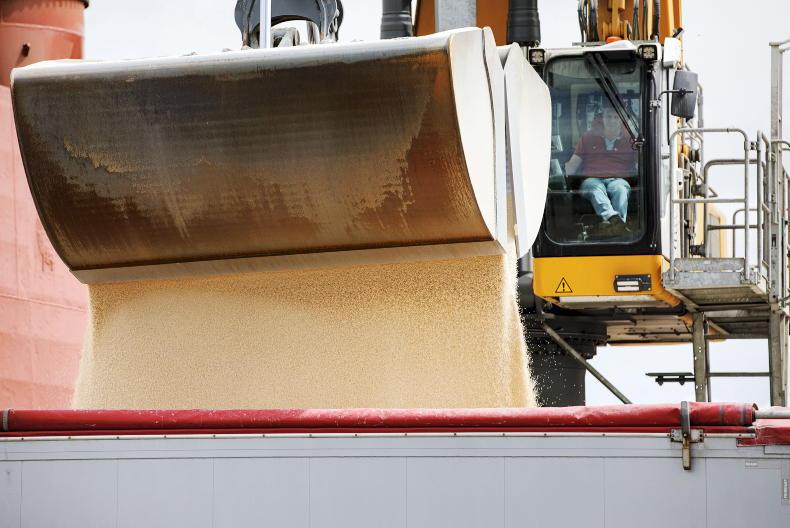
The characteristics of protected urea are much different to those of CAN and other NPK fertilisers. It’s a lighter product so it is less dense (hence why the same size bulk bags are 375kg and not 500kg).
The best analogy is to think of every individual granule/prill of CAN as a golf ball and the protected urea granules/prills as a ping-pong balls – size is roughly the same but the weight is much different.
Therefore, when you throw the golf ball and ping-pong ball with the same degree of force, the golf ball will travel a much further distance. In order to throw the ping-pong ball (protected urea in this case) the same distance, adjustments need to be made in how it is thrown, ie spreader settings need to be adjusted accordingly.
Flow rate
Check the flow rate of the fertiliser by calibrating the spreader. Different fertilisers will flow at different rates, so the shutter position for 125kg/ha of protected urea will be different to the shutter position for 125kg/ha of CAN.
The flow rate of matching product types tends to vary between brands and even age, so it’s important to establish the flow rate for the specific product being spread on the day.
This is done by removing one of the discs and placing a bucket under the shutter outlet. Run the tractor PTO, then open the shutter for 30 seconds and collect the fertiliser in the bucket.

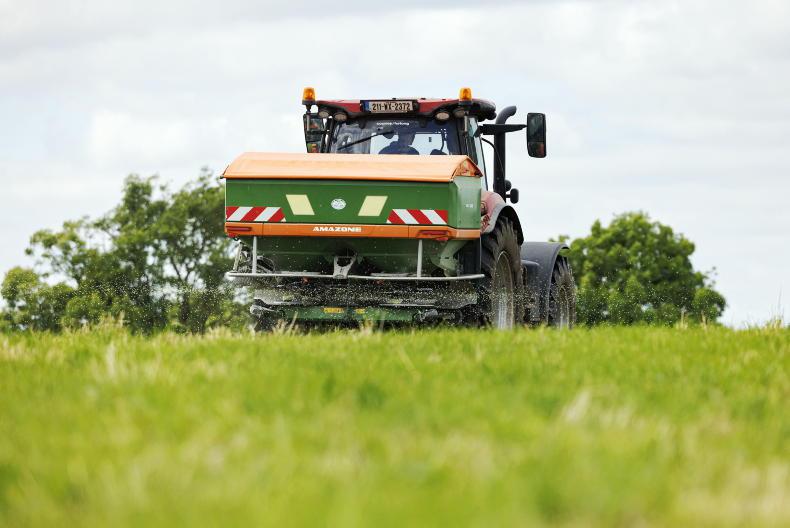
With much talk around the performance of protected urea, farmers need to bear in mind that spreader setup is crucial given its differing characteristics to CAN and other NPK fertilisers. \ Donal O'Leary
Check the amount collected against the fertiliser spreader app for your spreader and adjust the shutter position as guided, if necessary. If there is no app for your spreader, the weight of the collected fertiliser after 30 seconds may need to be plugged into a simple formula to establish shutter position, as guided by the operator’s manual.
Spreader height
Start with the basics. Ensure that both rear tractor tyres have equal inflation pressures.
Then mount the spreader so that it is level in all directions, left to right and front to back.
Levelness should be checked when the spreader is at the correct working height. This is normally a disc height of around 70cm over the crop, but check the machine’s user manual. The spreader should be fastened centrally behind the tractor using the stabilisers.
It is critical that the machine is in good mechanical working order, particularly the spreading vanes.
Worn vanes (wave-like surface) will have a big impact on machine performance. What may appear as minor wear on a vane will have an increasing negative effect the wider the bout width.
Depending on the manufacturer and spreader model, vane position may go unchanged when switching between NPK and CAN fertilisers.
However, it should not be assumed that this is the same for urea-based products.
Most manufacturers offer a calibration/spread chart app for modern machines.
These apps are easily used and require the following criteria inputted: application rate, product type, flow rate, spreading width, forward speed, etc. It will then indicate the specific vane position, shutter/regulator position, PTO speed and, in some cases, fertiliser drop point and hopper angle for the specific product application.
While changing machine settings, check for wobbles in the discs and agitators, as bearings can wear out over time.
It’s all well and good setting the machine up to manufacturer’s requirements based on the variables inputted.
But, in order to prove the setup procedure is accurate, a tray test should ideally be carried out in the field. This proves the accuracy of an application based on evidence.
Set trays at equal distance across full bout width. Run the spreader over the trays in three passes, far left, centre and far right to ensure full spread pattern is recorded. Then, collect fertiliser in measuring cylinders and compare.
Density of fertiliser and spreader setup
Granule density represents the mass to volume ratio of granules. This is a measure of the physical weight of one litre of fertiliser measured by a weighing scale. Urea is a low-density fertiliser with a granule density of 0.75kg/l compared to CAN (27%) with a higher density of 1kg/l. This will impact spreading width and, as result, the overall spread pattern if not accounted for.
Bulk density of protected urea is not the same as CAN and NPK products.Correct spreader setup is crucial when spreading urea.Spreaders must be in good working order.Calculating fertiliser flow rate is important for accurate spreader calibration. Tray test to confirm spreader accuracy.Nitrogen and phosphorus spreading ends on 14 September.
For many farmers, the move towards urea-based fertiliser products is one that is relatively new and one that came about when fertiliser prices hit record highs in 2022.
The main reason was the bang for buck that urea-based products offer per unit of nitrogen, compared to CAN.
Although the spreading season for chemical nitrogen and phosphorus ends within a month (14 September), the aim of this article is to emphasise the importance of spreader setup when spreading urea in order to achieve the best results.
Many farmers have questioned Teagasc’s latest update on protected urea performance, which outlined that there was no difference in grass growth between protected urea-based fertilisers and traditional can or urea fertilisers.
Since the findings have been published, a cohort of farmers have responded with conflicting results.
The truth of the matter is that some farmers may in fact be witnessing conflicting results to what Teagasc has observed.
However, in most cases, the product is not to blame but the way in which the spreader is set up is instead.
The characteristics of protected urea are much different to those of CAN and other NPK fertilisers. It’s a lighter product so it is less dense (hence why the same size bulk bags are 375kg and not 500kg).
The best analogy is to think of every individual granule/prill of CAN as a golf ball and the protected urea granules/prills as a ping-pong balls – size is roughly the same but the weight is much different.
Therefore, when you throw the golf ball and ping-pong ball with the same degree of force, the golf ball will travel a much further distance. In order to throw the ping-pong ball (protected urea in this case) the same distance, adjustments need to be made in how it is thrown, ie spreader settings need to be adjusted accordingly.
Flow rate
Check the flow rate of the fertiliser by calibrating the spreader. Different fertilisers will flow at different rates, so the shutter position for 125kg/ha of protected urea will be different to the shutter position for 125kg/ha of CAN.
The flow rate of matching product types tends to vary between brands and even age, so it’s important to establish the flow rate for the specific product being spread on the day.
This is done by removing one of the discs and placing a bucket under the shutter outlet. Run the tractor PTO, then open the shutter for 30 seconds and collect the fertiliser in the bucket.
With much talk around the performance of protected urea, farmers need to bear in mind that spreader setup is crucial given its differing characteristics to CAN and other NPK fertilisers. \ Donal O'Leary
Check the amount collected against the fertiliser spreader app for your spreader and adjust the shutter position as guided, if necessary. If there is no app for your spreader, the weight of the collected fertiliser after 30 seconds may need to be plugged into a simple formula to establish shutter position, as guided by the operator’s manual.
Spreader height
Start with the basics. Ensure that both rear tractor tyres have equal inflation pressures.
Then mount the spreader so that it is level in all directions, left to right and front to back.
Levelness should be checked when the spreader is at the correct working height. This is normally a disc height of around 70cm over the crop, but check the machine’s user manual. The spreader should be fastened centrally behind the tractor using the stabilisers.
It is critical that the machine is in good mechanical working order, particularly the spreading vanes.
Worn vanes (wave-like surface) will have a big impact on machine performance. What may appear as minor wear on a vane will have an increasing negative effect the wider the bout width.
Depending on the manufacturer and spreader model, vane position may go unchanged when switching between NPK and CAN fertilisers.
However, it should not be assumed that this is the same for urea-based products.
Most manufacturers offer a calibration/spread chart app for modern machines.
These apps are easily used and require the following criteria inputted: application rate, product type, flow rate, spreading width, forward speed, etc. It will then indicate the specific vane position, shutter/regulator position, PTO speed and, in some cases, fertiliser drop point and hopper angle for the specific product application.
While changing machine settings, check for wobbles in the discs and agitators, as bearings can wear out over time.
It’s all well and good setting the machine up to manufacturer’s requirements based on the variables inputted.
But, in order to prove the setup procedure is accurate, a tray test should ideally be carried out in the field. This proves the accuracy of an application based on evidence.
Set trays at equal distance across full bout width. Run the spreader over the trays in three passes, far left, centre and far right to ensure full spread pattern is recorded. Then, collect fertiliser in measuring cylinders and compare.
Density of fertiliser and spreader setup
Granule density represents the mass to volume ratio of granules. This is a measure of the physical weight of one litre of fertiliser measured by a weighing scale. Urea is a low-density fertiliser with a granule density of 0.75kg/l compared to CAN (27%) with a higher density of 1kg/l. This will impact spreading width and, as result, the overall spread pattern if not accounted for.
Bulk density of protected urea is not the same as CAN and NPK products.Correct spreader setup is crucial when spreading urea.Spreaders must be in good working order.Calculating fertiliser flow rate is important for accurate spreader calibration. Tray test to confirm spreader accuracy.Nitrogen and phosphorus spreading ends on 14 September. 


SHARING OPTIONS