A Teagasc and Centenary Agri silage event held last week had a focus on building and repairing silage pits.
A simple silage base is the most straightforward and cheapest option to construct, but it may not be the most efficient design when it comes to storage capacity.
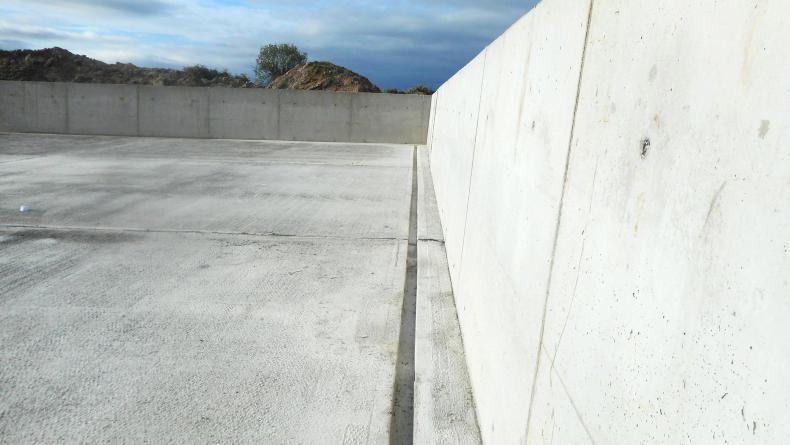
Andy Fogarty of Fogarty Concrete told those in attendance what their options may be: “While a lot of people are going for a simple base, they are losing a lot of the capacity without putting in walls. If you did put walls on the pit you wouldn’t need as big of an area.
“One thing that I have seen done on a few farms lately was to build a pit with an L-shaped wall. This means you have a greater capacity and it gives you scope for future expansion,” Andy explained.
“There are a lot of advantages of going for a new site as opposed to breaking up an old one, including the cost.”
While farmers will always weigh up whether to go for a TAMS grant on a project or not, for Andy the cost of the construction should not influence the decision. “It will cost the same type of money whether you are putting in a silage base through the grant or not. There are very little savings to be made without going through the grant,” Andy argued.
“It is generally the work outside of the actual construction that might add cost to the project, if you have to pay for retention on other buildings in the yard for example.”
Curing the concrete
One of the most important aspects of constructing a silage pit is ensuring the concrete is left to cure properly, according to Andy. “It’s very important that it is left to cure properly. It should be left for three weeks and covered with plastic. This will help to keep it damp and prevent it from drying out too quickly and cracking.”
The Department specifications outline that all concrete must be cured by keeping it thoroughly moist for at least seven days. Wetted floor slabs and tanks walls must be protected by polythene sheeting, kept securely in place. Concrete must be at least 28 days old before being subjected to silage or effluent.

Aidan McGrath (left) who works for Teagasc to complete TAMS applications and Andy Fogarty (right) of Fogarty Concrete.
If repairing an existing base, Andy recommends that you first put down a layer of plastic, followed by a layer of sand on which the concrete can then be poured. If you just pour it directly on the damaged concrete base, then the existing cracks may develop in the newly poured concrete.
Also speaking on the day was Aidan McGrath, who completes the TAMS applications for Teagasc in Tipperary. “An important thing for farmers to note is that a silage slab is not nitrates relevant. This means that they do not have to satisfy the storage requirements for slurry on their farm to be eligible for TAMS grant aid for a silage base.”
Read more
Capacity key for new finishing shed
A Teagasc and Centenary Agri silage event held last week had a focus on building and repairing silage pits.
A simple silage base is the most straightforward and cheapest option to construct, but it may not be the most efficient design when it comes to storage capacity.
Andy Fogarty of Fogarty Concrete told those in attendance what their options may be: “While a lot of people are going for a simple base, they are losing a lot of the capacity without putting in walls. If you did put walls on the pit you wouldn’t need as big of an area.
“One thing that I have seen done on a few farms lately was to build a pit with an L-shaped wall. This means you have a greater capacity and it gives you scope for future expansion,” Andy explained.
“There are a lot of advantages of going for a new site as opposed to breaking up an old one, including the cost.”
While farmers will always weigh up whether to go for a TAMS grant on a project or not, for Andy the cost of the construction should not influence the decision. “It will cost the same type of money whether you are putting in a silage base through the grant or not. There are very little savings to be made without going through the grant,” Andy argued.
“It is generally the work outside of the actual construction that might add cost to the project, if you have to pay for retention on other buildings in the yard for example.”
Curing the concrete
One of the most important aspects of constructing a silage pit is ensuring the concrete is left to cure properly, according to Andy. “It’s very important that it is left to cure properly. It should be left for three weeks and covered with plastic. This will help to keep it damp and prevent it from drying out too quickly and cracking.”
The Department specifications outline that all concrete must be cured by keeping it thoroughly moist for at least seven days. Wetted floor slabs and tanks walls must be protected by polythene sheeting, kept securely in place. Concrete must be at least 28 days old before being subjected to silage or effluent.

Aidan McGrath (left) who works for Teagasc to complete TAMS applications and Andy Fogarty (right) of Fogarty Concrete.
If repairing an existing base, Andy recommends that you first put down a layer of plastic, followed by a layer of sand on which the concrete can then be poured. If you just pour it directly on the damaged concrete base, then the existing cracks may develop in the newly poured concrete.
Also speaking on the day was Aidan McGrath, who completes the TAMS applications for Teagasc in Tipperary. “An important thing for farmers to note is that a silage slab is not nitrates relevant. This means that they do not have to satisfy the storage requirements for slurry on their farm to be eligible for TAMS grant aid for a silage base.”
Read more
Capacity key for new finishing shed


SHARING OPTIONS