Many people are donating cloth masks to those working in private nursing homes; or if you just want to make your own protective cotton facemask, here are some instructions:
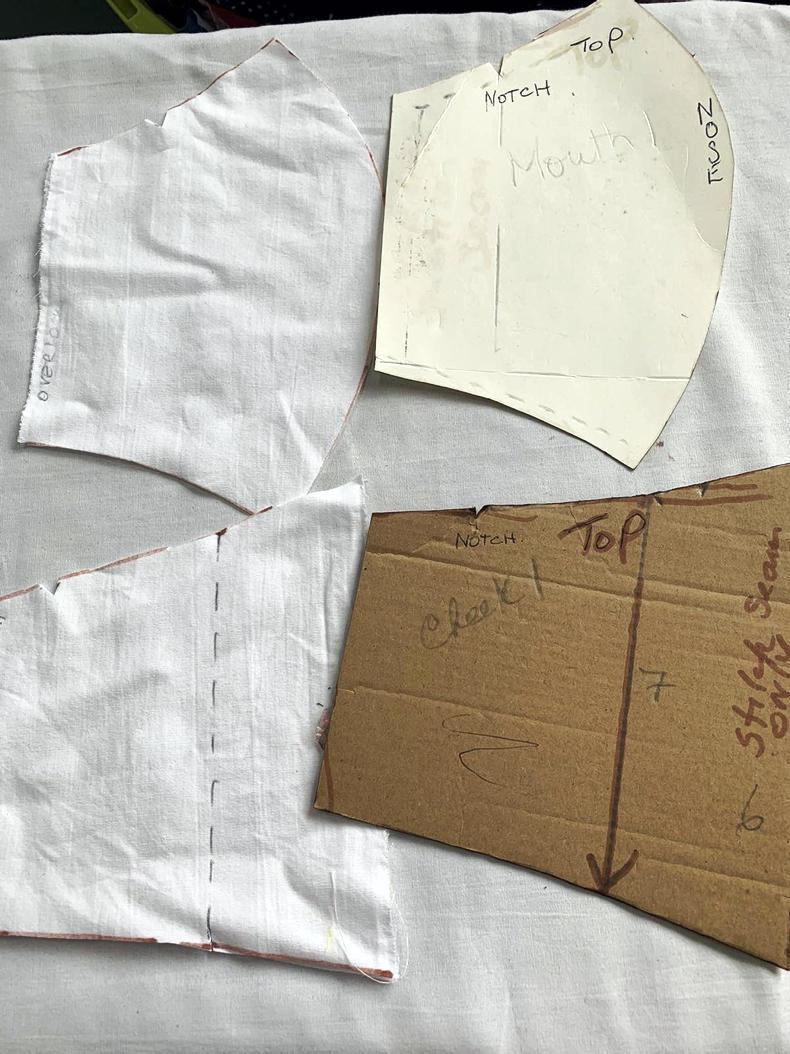
This pattern has three pieces.Download your face template here.
Download your cheek template here.
Download your mouth template here.
Use fabric/tightly woven cottons or cotton/polyester (wash fabric before cutting out).What you need:
Main unit.
Nose unit.
Cheek unit.
Cut on the double
It is very important to mark the pattern pieces clearly with tailors chalk or a marker. This is to identify where the pattern pieces are to be fitted when cut out.
1 Sew main piece along centre front, iron our seam and top stitch if preferred.
2 Prepare the nose and cheek pieces by sewing a ¼ inch seam on the edge seams as this will be the finished edge when the mask is turned out.
3 Sew nose piece and iron out seam.
4 Place cheek pieces in place again matching notches and pin in place.
5 Stitch all around mask, removing pins as you go.
6 Clip edges/corners to neaten (do not cut too close to stitching).
7 Pull through the filter opening.
8 Iron out corners and seams.
9 Finish with a cord/ribbon/lacer long enough for persons head.
Tip: use recycle old t-shirts.
10 Cut strips 1½in wide by 18in long, pull and it will make a tie for mask.
11 There are instructions online for an alternative mask a wire unit can be added at the nose also.


Read more
Home sewing project: making a face mask
From the Frontline: control the controllable
Many people are donating cloth masks to those working in private nursing homes; or if you just want to make your own protective cotton facemask, here are some instructions:
This pattern has three pieces.Download your face template here.
Download your cheek template here.
Download your mouth template here.
Use fabric/tightly woven cottons or cotton/polyester (wash fabric before cutting out).What you need:
Main unit.
Nose unit.
Cheek unit.
Cut on the double
It is very important to mark the pattern pieces clearly with tailors chalk or a marker. This is to identify where the pattern pieces are to be fitted when cut out.
1 Sew main piece along centre front, iron our seam and top stitch if preferred.
2 Prepare the nose and cheek pieces by sewing a ¼ inch seam on the edge seams as this will be the finished edge when the mask is turned out.
3 Sew nose piece and iron out seam.
4 Place cheek pieces in place again matching notches and pin in place.
5 Stitch all around mask, removing pins as you go.
6 Clip edges/corners to neaten (do not cut too close to stitching).
7 Pull through the filter opening.
8 Iron out corners and seams.
9 Finish with a cord/ribbon/lacer long enough for persons head.
Tip: use recycle old t-shirts.
10 Cut strips 1½in wide by 18in long, pull and it will make a tie for mask.
11 There are instructions online for an alternative mask a wire unit can be added at the nose also.


Read more
Home sewing project: making a face mask
From the Frontline: control the controllable


SHARING OPTIONS