With fertiliser prices at record levels, correct machine setup and accurate application has become more important than ever.
Machines should be inspected and calibrated before and several times over the course of the spreading season, ensuring the desired application rate is being met. Correct spreader setup is an essential step in the efficient use of fertiliser.
Machine inspection
Firstly, examine the frame, hopper and the spreading mechanism for signs of wear. Look out for severe corrosion or cracks which may have a negative effect on performance or load-carrying ability.
Check that the shutters are opening and closing properly and that the agitators are in good order, with no play in the bearings. Wear in components such as shutter linkages and disc bearings will affect spreader performance.
On a disc machine, examine the disc bearings for wear by rocking each disc vertically, assessing the level of play. Ideally, there should be none, but manufacturers say minor play, such as 1mm, is OK but anything more will need attention. These bearings are often maintenance-free or sealed as part of the gearbox. If replacing one bearing, replace the other for peace of mind.
If you have a wagtail spreader, check the spreading mechanism for wear and that the bearings are in good order. The diffuser band on the wagtail spout should be intact. If broken, this would have a major effect on the spread pattern.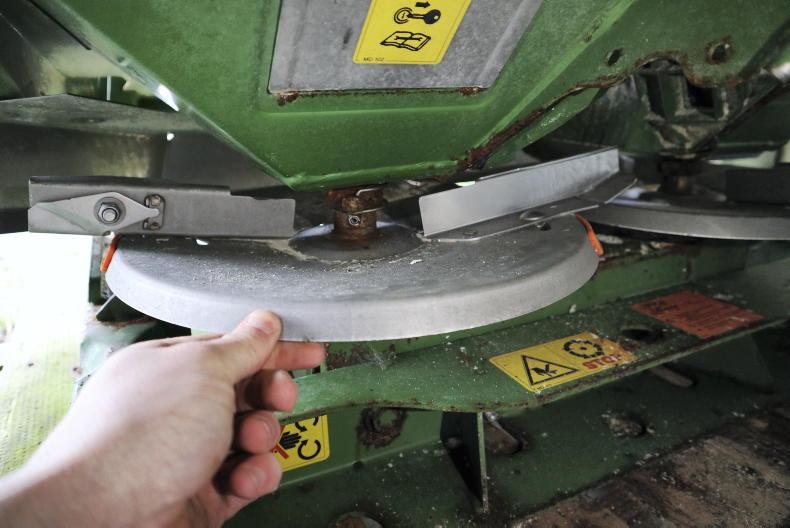
On a disc machine, examine the disc bearings for wear by rocking each disc vertically, assessing the level of play (1mm is OK).
The leading edge on the spreading vanes which comes into contact with fertiliser should be smooth. Vanes with a wrinkled effect are worn and need to be replaced. Vanes with a track worn against the top lip also need to be replaced as the track will cause a deviation in the spread pattern. Depending on the make and model, a new set of vanes will cost about €350 to €400 plus VAT. 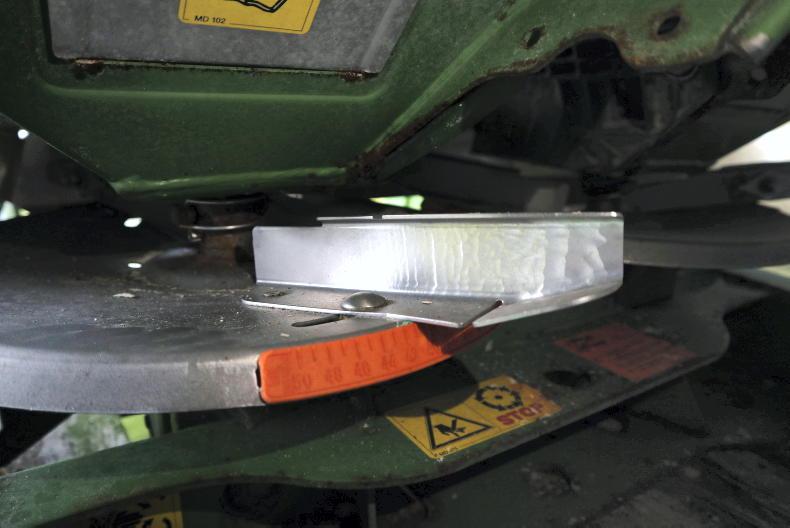
Vanes with a wrinkled edge are worn and will need replacing as this causes a deviation in the spread pattern.
Higher-specification spreaders with a headland management system should be checked to ensure the system is engaging and disengaging. Directional change levers on the gearbox should be properly engaging and disengaging (slot in and out of position easily). Finally, grease all lubrication points including the PTO shaft. 
Higher-specification spreaders equipped with a headland management system should be checked over that the system is engaging and disengaging.
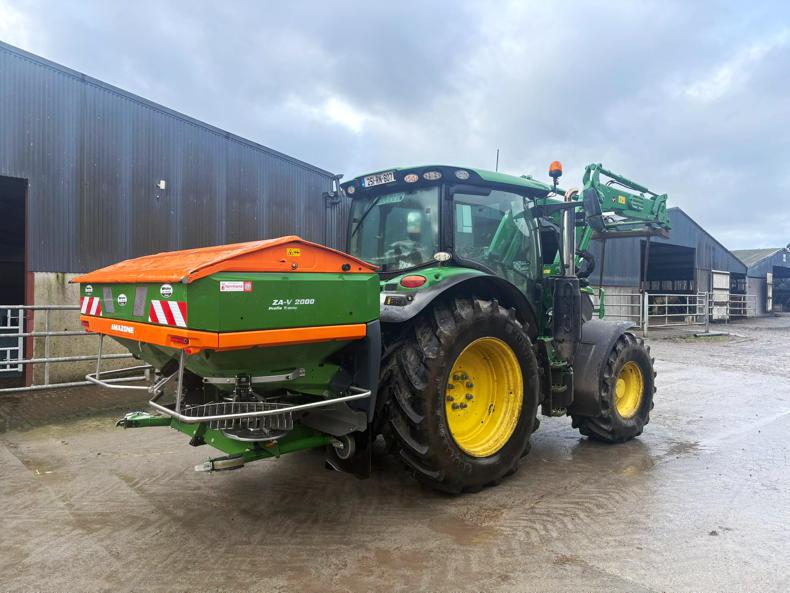
Mounting the spreader
The first thing to do before attaching the spreader is to ensure both drop arms on the tractor are the same length. Check that the pressure in both rear tyres is equal. An unlevel spreader will affect spread pattern.
Once mounted on the tractor, ensure both stabilisers are tight, allowing no lateral movement. Ensure the spreader is mounted at the centre of the tractor’s track width. Once this is complete, raise the spreader to the correct working height.
The general rule is to have a distance of 75cm from the top of the crop to the spreading mechanism. Next, adjust the toplink to the angle advised by either the spread chart or manufacturer.
The first thing to do before attaching the spreader is to measure that both drop arms on the tractor are the same length.
Setting the spreader
A disc machine has two main areas of adjustment – fertiliser flow rate and disc/vane settings. A wagtail has just one area to adjust – flow rate.
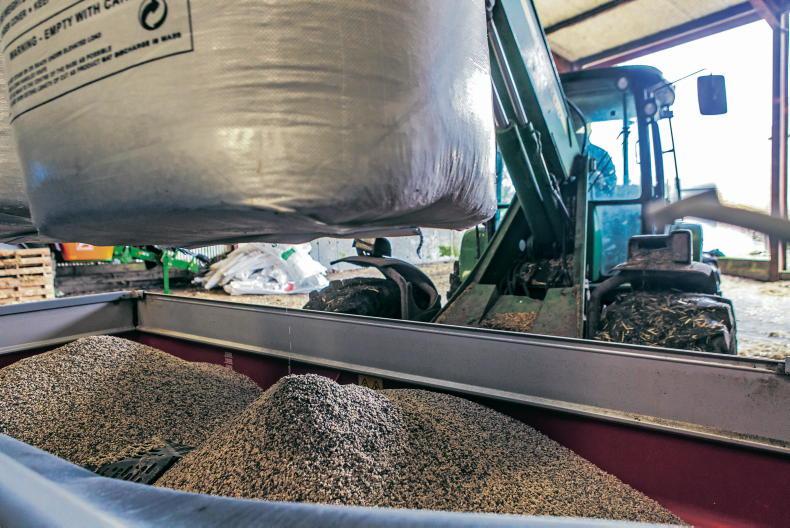
The steps involved in setting the desired flow rate on both machine types is similar. Flow rate is adjusted by moving the regulator. Obviously, one regulator setting for a desired application rate will not work for all fertilisers as the flow rates of each vary depending on characteristics of the sample (shape, size and brand) – no two samples are the same. 
Once mounted on the tractor, ensure both stabilisers are tight, allowing no lateral movement.
Knowing the correct flow rate is essential if a correct application rate (kg/ha) is to be achieved. Setting the regulator only ensures that the correct amount is coming out of the machine. Further adjustments may be needed to ensure fertiliser is being spread evenly. These adjustments will vary for each machine, so refer to calibration settings for your machine. 
Most manufacturers have smartphone apps that allow you to input spreading info before displaying the machine settings to achieve this.
Disc spreader
Depending on the spreader, a number of the following adjustments may need to be made – vane type and position, fertiliser drop point, disc size and toplink angle. All may need to be adjusted in accordance with the spreading chart at the set working width (m), application rate (kg/ha), forward speed (km/h) and type of fertiliser being applied. These adjustments vary from brand to brand so you will need to refer to the manufacturer’s settings and spread charts (in spreader manual or settings book).
Most manufacturers have smartphone apps that show spread charts and have calculators that allow you input information such as fertiliser type, application rate, forward speed and spreading width and then display the machine settings to achieve this. Most manufacturers also have a huge selection of fertiliser types and brands already tested in their test halls.
The spread chart will also indicate the accurate kg/min for each particular fertiliser for a machine. However, fertiliser will vary over time and calibrating the flow rate is the only way to make sure the output setting is fully correct.
To do this, shut off one side of the spreader, remove the disc on the other side and fit a calibration container or a bucket. The spreader should be run for one minute while the container gathers the fertiliser. The PTO should be running during the calibration as the agitator at the bottom of the hopper needs to be moving to ensure an even and steady flow of fertiliser. After one minute, the container’s weight should match the kg/min rate as displayed by the app or spread chart.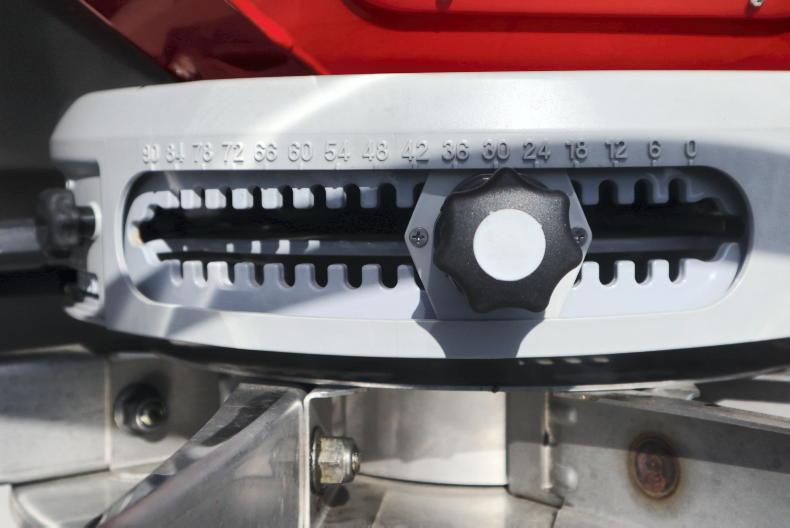
Fertiliser flow rate is adjusted by moving the regulator.
Wagtail spreader
Wagtail spreaders require no further setting up once mounted correctly and the flow rate has been established. This is done using the regulator, and again depends on the working width (m), application rate (kg/ha), forward speed (km/h) and type of fertiliser being applied.
Again, most manufacturers have apps that allow you input these variables along with the fertiliser type. The app will provide you with a setting or spread chart to suit the fertiliser being used.
Once again, the spreader’s flow rate should be calibrated to ensure it spreads what it is set to. The calibration procedure is almost the same to that of a disc machine. You remove the spout and fit on a calibration container. The app or spread chart will provide a rate in kg/min which should match that coming from the spreader. Run the spreader at the setting recommended by the app or spread chart and then weigh the fertiliser that comes out over the course of the minute. If the two figures don’t match, some fine-tuning may be required.

A wagtail spreader's flow rate should be calibrated to ensure that it spreads what it is set to spread.
Competent operator
Once the machine has been set up, it’s down to the operator to drive accurately, ensuring PTO and forward speed is correct and the correct bout width is being maintained. To check the spread pattern of the fertiliser across the bout width, a tray test can be carried out. This involves laying out trays evenly across the working width and making a pass spreading fertiliser over the trays. The material in each tray is then put into small tubes so that the balance of spread can be assessed. This is important to ensure accurate application and should be carried out at least once a season for each fertiliser type.
When using a wagtail spreader with a typical working width in the region of 10-12m, it’s easier to maintain an accurate bout width by eye. Working with wider bout widths or in a recently cut field makes it much more difficult to maintain accuracy.
A basic GPS guidance system is a good investment for farmers. These systems help to cut out overlapping and reduce fertiliser usage.
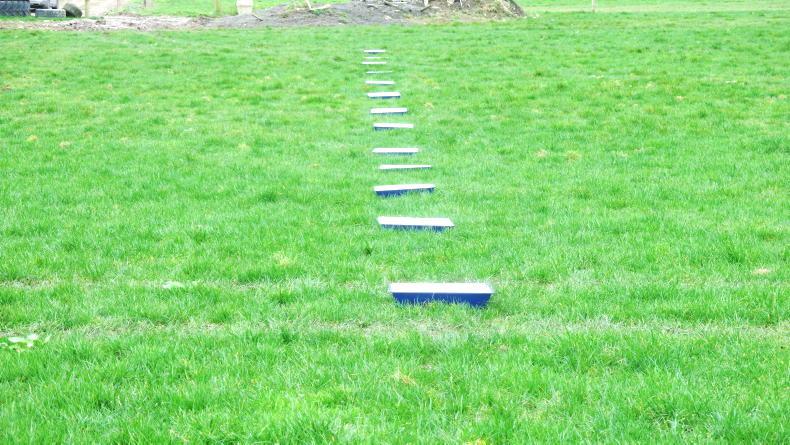
To check the spread pattern of the fertiliser across the bout width, a tray test can be carried out.
With fertiliser prices at record levels, correct machine setup and accurate application has become more important than ever.
Machines should be inspected and calibrated before and several times over the course of the spreading season, ensuring the desired application rate is being met. Correct spreader setup is an essential step in the efficient use of fertiliser.
Machine inspection
Firstly, examine the frame, hopper and the spreading mechanism for signs of wear. Look out for severe corrosion or cracks which may have a negative effect on performance or load-carrying ability.
Check that the shutters are opening and closing properly and that the agitators are in good order, with no play in the bearings. Wear in components such as shutter linkages and disc bearings will affect spreader performance.
On a disc machine, examine the disc bearings for wear by rocking each disc vertically, assessing the level of play. Ideally, there should be none, but manufacturers say minor play, such as 1mm, is OK but anything more will need attention. These bearings are often maintenance-free or sealed as part of the gearbox. If replacing one bearing, replace the other for peace of mind.
If you have a wagtail spreader, check the spreading mechanism for wear and that the bearings are in good order. The diffuser band on the wagtail spout should be intact. If broken, this would have a major effect on the spread pattern.
On a disc machine, examine the disc bearings for wear by rocking each disc vertically, assessing the level of play (1mm is OK).
The leading edge on the spreading vanes which comes into contact with fertiliser should be smooth. Vanes with a wrinkled effect are worn and need to be replaced. Vanes with a track worn against the top lip also need to be replaced as the track will cause a deviation in the spread pattern. Depending on the make and model, a new set of vanes will cost about €350 to €400 plus VAT.
Vanes with a wrinkled edge are worn and will need replacing as this causes a deviation in the spread pattern.
Higher-specification spreaders with a headland management system should be checked to ensure the system is engaging and disengaging. Directional change levers on the gearbox should be properly engaging and disengaging (slot in and out of position easily). Finally, grease all lubrication points including the PTO shaft.
Higher-specification spreaders equipped with a headland management system should be checked over that the system is engaging and disengaging.
Mounting the spreader
The first thing to do before attaching the spreader is to ensure both drop arms on the tractor are the same length. Check that the pressure in both rear tyres is equal. An unlevel spreader will affect spread pattern.
Once mounted on the tractor, ensure both stabilisers are tight, allowing no lateral movement. Ensure the spreader is mounted at the centre of the tractor’s track width. Once this is complete, raise the spreader to the correct working height.
The general rule is to have a distance of 75cm from the top of the crop to the spreading mechanism. Next, adjust the toplink to the angle advised by either the spread chart or manufacturer.
The first thing to do before attaching the spreader is to measure that both drop arms on the tractor are the same length.
Setting the spreader
A disc machine has two main areas of adjustment – fertiliser flow rate and disc/vane settings. A wagtail has just one area to adjust – flow rate.
The steps involved in setting the desired flow rate on both machine types is similar. Flow rate is adjusted by moving the regulator. Obviously, one regulator setting for a desired application rate will not work for all fertilisers as the flow rates of each vary depending on characteristics of the sample (shape, size and brand) – no two samples are the same.
Once mounted on the tractor, ensure both stabilisers are tight, allowing no lateral movement.
Knowing the correct flow rate is essential if a correct application rate (kg/ha) is to be achieved. Setting the regulator only ensures that the correct amount is coming out of the machine. Further adjustments may be needed to ensure fertiliser is being spread evenly. These adjustments will vary for each machine, so refer to calibration settings for your machine.
Most manufacturers have smartphone apps that allow you to input spreading info before displaying the machine settings to achieve this.
Disc spreader
Depending on the spreader, a number of the following adjustments may need to be made – vane type and position, fertiliser drop point, disc size and toplink angle. All may need to be adjusted in accordance with the spreading chart at the set working width (m), application rate (kg/ha), forward speed (km/h) and type of fertiliser being applied. These adjustments vary from brand to brand so you will need to refer to the manufacturer’s settings and spread charts (in spreader manual or settings book).
Most manufacturers have smartphone apps that show spread charts and have calculators that allow you input information such as fertiliser type, application rate, forward speed and spreading width and then display the machine settings to achieve this. Most manufacturers also have a huge selection of fertiliser types and brands already tested in their test halls.
The spread chart will also indicate the accurate kg/min for each particular fertiliser for a machine. However, fertiliser will vary over time and calibrating the flow rate is the only way to make sure the output setting is fully correct.
To do this, shut off one side of the spreader, remove the disc on the other side and fit a calibration container or a bucket. The spreader should be run for one minute while the container gathers the fertiliser. The PTO should be running during the calibration as the agitator at the bottom of the hopper needs to be moving to ensure an even and steady flow of fertiliser. After one minute, the container’s weight should match the kg/min rate as displayed by the app or spread chart.
Fertiliser flow rate is adjusted by moving the regulator.
Wagtail spreader
Wagtail spreaders require no further setting up once mounted correctly and the flow rate has been established. This is done using the regulator, and again depends on the working width (m), application rate (kg/ha), forward speed (km/h) and type of fertiliser being applied.
Again, most manufacturers have apps that allow you input these variables along with the fertiliser type. The app will provide you with a setting or spread chart to suit the fertiliser being used.
Once again, the spreader’s flow rate should be calibrated to ensure it spreads what it is set to. The calibration procedure is almost the same to that of a disc machine. You remove the spout and fit on a calibration container. The app or spread chart will provide a rate in kg/min which should match that coming from the spreader. Run the spreader at the setting recommended by the app or spread chart and then weigh the fertiliser that comes out over the course of the minute. If the two figures don’t match, some fine-tuning may be required.
A wagtail spreader's flow rate should be calibrated to ensure that it spreads what it is set to spread.
Competent operator
Once the machine has been set up, it’s down to the operator to drive accurately, ensuring PTO and forward speed is correct and the correct bout width is being maintained. To check the spread pattern of the fertiliser across the bout width, a tray test can be carried out. This involves laying out trays evenly across the working width and making a pass spreading fertiliser over the trays. The material in each tray is then put into small tubes so that the balance of spread can be assessed. This is important to ensure accurate application and should be carried out at least once a season for each fertiliser type.
When using a wagtail spreader with a typical working width in the region of 10-12m, it’s easier to maintain an accurate bout width by eye. Working with wider bout widths or in a recently cut field makes it much more difficult to maintain accuracy.
A basic GPS guidance system is a good investment for farmers. These systems help to cut out overlapping and reduce fertiliser usage.
To check the spread pattern of the fertiliser across the bout width, a tray test can be carried out.


SHARING OPTIONS