GPS guidance of any type can help with efficiency on most farms, whether tillage or grass-based systems.
Accuracy when spreading or spraying expensive chemical inputs is essential to being profitable, from the simple light-bar visual guidance system (a free service) right up to the inbuilt auto-steer with an RTK paid licence for maximum accuracy.
With the recent introduction of the TAMS II (tillage) grant, some of this equipment can be claimed under grant aid. Although having the auto-steer system fitted in the tractor from new is preferable, all of the GPS system manufacturers now supply aftermarket kits to give you the same functions on older tractors.
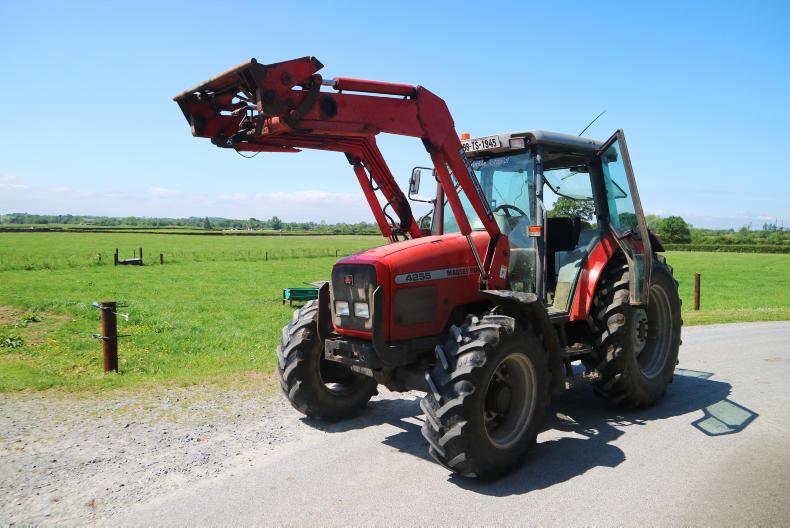
 For this reason, I decided to get an expert to run through the process of fitting a system on to an older model tractor. The model chosen was a Massey Ferguson 4255 registered in 1998, a common tractor found on farms around Ireland.
The system was supplied by Vantage Ireland, who are the dealers for Trimble Guidance in Ireland. Mick McCarthy from Trimble and I set about the job.
The first step of the process is the removal of the tractor’s original steering wheel. This can be the most difficult part, as many of them are mounted on splined and tapered shafts and have been in place for long periods of time. Luckily, the 4255 we were working on was agreeable. A socket to open the nut and a small bit of persuasion and off it came.
The next step is the removal of any plastic cowls from around the steering column. Once this has been removed, a specific bracket for each model of tractor is available to lock the new steering motor in place. This bracket bolts to existing bolt holes on the column.
Steering motor
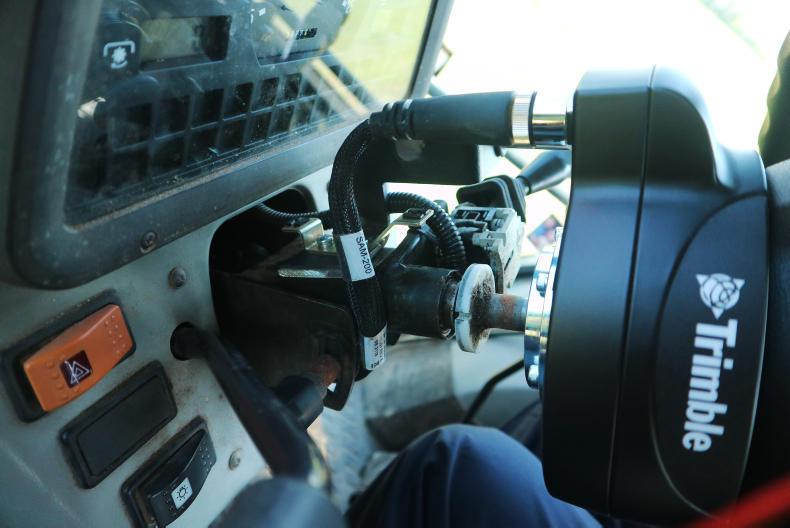
Once the anti-rotation bracket is in place, the steering motor needs to be placed on to the steering column, taking great care that the splines are correct for the tractor and positioning it correctly and gently.

When the motor has been fitted correctly, it should be fixed in place with the new nut supplied with the system and not the old nut. The original steering wheel and nut should be kept together in a safe place in case they are required at a later date.
Once the motor has been securely tightened in position, the new steering wheel then needs to be attached to the motor using a collection of Allen keys. As you would expect, great care should be taken to make sure that these are correctly positioned and tightened, as this is the link that the operator will use to steer the tractor when in normal use. It should be as well connected as the original.
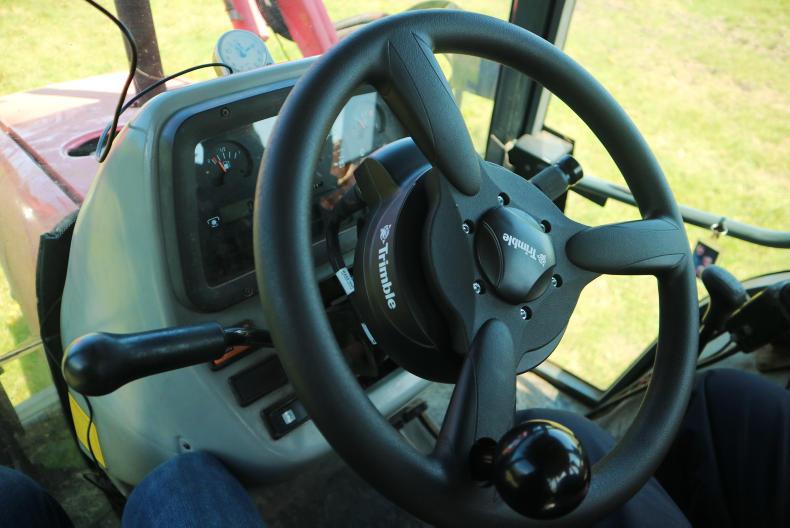
One interesting thing about the new Trimble steering wheel is that it is flat.
When I asked Mick about the reason for this, he explained that because of the fitting of the steering motor on to the column, the wheel is now 50mm closer to the driver. Therefore, with the flat wheel replacing the dished one, the steering wheel position is as close as possible to the original position.

Once the physical steering wheel is in place, the system needs to be wired. The first requirement is obviously power. Trimble says that you should take a feed directly from the battery, so that their system in no way interferes with the tractor’s own electrical system.
For this, he connected directly and placed an inline fuse in the circuit. The fuse that was required for this was a meaty 40amp version. The motor draws a large current. This was proven to me, as Mick said that, on one occasion in the past, he had fitted a system to a Massey 35X and the motor was able to turn the steering when the tractor was moving. If it is capable of that on a non-power-steering tractor, then I need lots of power to drive it.
Brains
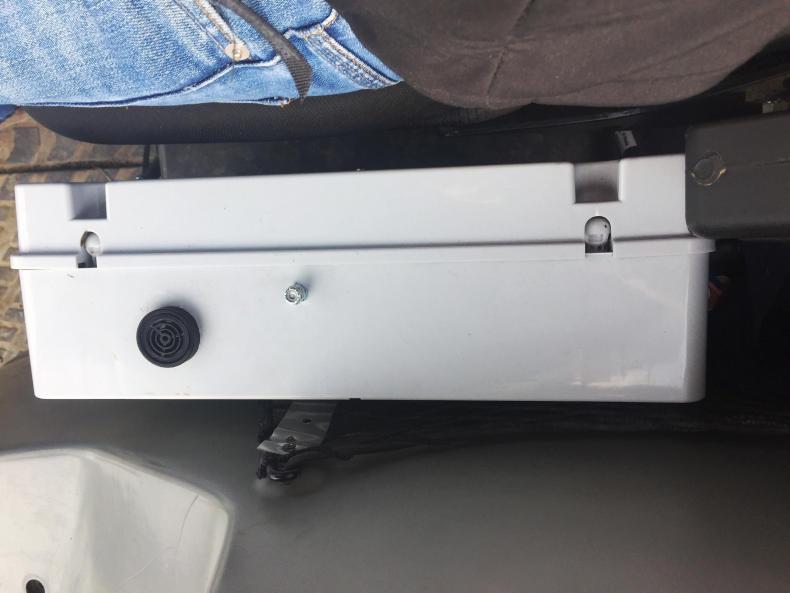
 This system had all the bells and whistle, which means that the brains of the operation are separate from the display. These parts of the system were placed in a protective box and positioned beside the driver’s seat in the 4255. The power cable was routed back from the battery to the control box.
The next step of the process was getting an antenna on the roof and the signal back to the control box. The antenna should be placed as close as possible to the centre of the tractor and the highest possible point in order to give the best possible signal. The more satellites it can see, the better the accuracy.
A metal plate was attached to the roof of the tractor to attach the magnetic antenna to it. The plate can be left in place to guarantee that the antenna goes back in the same position after it has been removed.
Now that we had signal and power to the control box, signal to the display and actual steering was required. This only required one cable to each piece of hardware. The one to the steering was routed under the floor covering and up at the back of the steering column and connected. The display was mounted on the right-hand side door bar using a special bracket. This cable was routed around the back of the seat and plugged into the system.
Field test
Once all the cables were attached, the tractor was brought out to the field and tested. The system worked perfectly, once I got used to the fact that the tractor was steering itself. It was very intuitive to use and the display gave all the information required at the touch of a button. This setup had swarth to swarth control, which allows the tractor to turn itself at the headlands.
The whole process of fitting this system took approximately three hours, but may take longer depending on the make and model of tractor.
The system that was fitted was Trimble’s flagship model and comes with a price to match, but systems with less accuracy and features are available at lower price points.
Cost
This system starts at €13,000, depending on type of correction and accuracy required. A modem required for VRS RTK, unlock codes are required to go from 6in accuracy to high precision.
Unlock codes are also required for features such as Next Swath, ISOBUS, vehicle sync, etc.
The same autopilot system can be fitted with a CFX 750 display costing €10,500. All prices plus VAT. Licence fees range from €300 to €995, depending on accuracy required.
Read more
Making a Massey remote control
Special focus: tractors 2017
GPS guidance of any type can help with efficiency on most farms, whether tillage or grass-based systems.
Accuracy when spreading or spraying expensive chemical inputs is essential to being profitable, from the simple light-bar visual guidance system (a free service) right up to the inbuilt auto-steer with an RTK paid licence for maximum accuracy.
With the recent introduction of the TAMS II (tillage) grant, some of this equipment can be claimed under grant aid. Although having the auto-steer system fitted in the tractor from new is preferable, all of the GPS system manufacturers now supply aftermarket kits to give you the same functions on older tractors.
 For this reason, I decided to get an expert to run through the process of fitting a system on to an older model tractor. The model chosen was a Massey Ferguson 4255 registered in 1998, a common tractor found on farms around Ireland.
The system was supplied by Vantage Ireland, who are the dealers for Trimble Guidance in Ireland. Mick McCarthy from Trimble and I set about the job.
The first step of the process is the removal of the tractor’s original steering wheel. This can be the most difficult part, as many of them are mounted on splined and tapered shafts and have been in place for long periods of time. Luckily, the 4255 we were working on was agreeable. A socket to open the nut and a small bit of persuasion and off it came.
The next step is the removal of any plastic cowls from around the steering column. Once this has been removed, a specific bracket for each model of tractor is available to lock the new steering motor in place. This bracket bolts to existing bolt holes on the column.
Steering motor
Once the anti-rotation bracket is in place, the steering motor needs to be placed on to the steering column, taking great care that the splines are correct for the tractor and positioning it correctly and gently.

When the motor has been fitted correctly, it should be fixed in place with the new nut supplied with the system and not the old nut. The original steering wheel and nut should be kept together in a safe place in case they are required at a later date.
Once the motor has been securely tightened in position, the new steering wheel then needs to be attached to the motor using a collection of Allen keys. As you would expect, great care should be taken to make sure that these are correctly positioned and tightened, as this is the link that the operator will use to steer the tractor when in normal use. It should be as well connected as the original.
One interesting thing about the new Trimble steering wheel is that it is flat.
When I asked Mick about the reason for this, he explained that because of the fitting of the steering motor on to the column, the wheel is now 50mm closer to the driver. Therefore, with the flat wheel replacing the dished one, the steering wheel position is as close as possible to the original position.

Once the physical steering wheel is in place, the system needs to be wired. The first requirement is obviously power. Trimble says that you should take a feed directly from the battery, so that their system in no way interferes with the tractor’s own electrical system.
For this, he connected directly and placed an inline fuse in the circuit. The fuse that was required for this was a meaty 40amp version. The motor draws a large current. This was proven to me, as Mick said that, on one occasion in the past, he had fitted a system to a Massey 35X and the motor was able to turn the steering when the tractor was moving. If it is capable of that on a non-power-steering tractor, then I need lots of power to drive it.
Brains
 This system had all the bells and whistle, which means that the brains of the operation are separate from the display. These parts of the system were placed in a protective box and positioned beside the driver’s seat in the 4255. The power cable was routed back from the battery to the control box.
The next step of the process was getting an antenna on the roof and the signal back to the control box. The antenna should be placed as close as possible to the centre of the tractor and the highest possible point in order to give the best possible signal. The more satellites it can see, the better the accuracy.
A metal plate was attached to the roof of the tractor to attach the magnetic antenna to it. The plate can be left in place to guarantee that the antenna goes back in the same position after it has been removed.
Now that we had signal and power to the control box, signal to the display and actual steering was required. This only required one cable to each piece of hardware. The one to the steering was routed under the floor covering and up at the back of the steering column and connected. The display was mounted on the right-hand side door bar using a special bracket. This cable was routed around the back of the seat and plugged into the system.
Field test
Once all the cables were attached, the tractor was brought out to the field and tested. The system worked perfectly, once I got used to the fact that the tractor was steering itself. It was very intuitive to use and the display gave all the information required at the touch of a button. This setup had swarth to swarth control, which allows the tractor to turn itself at the headlands.
The whole process of fitting this system took approximately three hours, but may take longer depending on the make and model of tractor.
The system that was fitted was Trimble’s flagship model and comes with a price to match, but systems with less accuracy and features are available at lower price points.
Cost
This system starts at €13,000, depending on type of correction and accuracy required. A modem required for VRS RTK, unlock codes are required to go from 6in accuracy to high precision.
Unlock codes are also required for features such as Next Swath, ISOBUS, vehicle sync, etc.
The same autopilot system can be fitted with a CFX 750 display costing €10,500. All prices plus VAT. Licence fees range from €300 to €995, depending on accuracy required.
Read more
Making a Massey remote control
Special focus: tractors 2017
 For this reason, I decided to get an expert to run through the process of fitting a system on to an older model tractor. The model chosen was a Massey Ferguson 4255 registered in 1998, a common tractor found on farms around Ireland.

 This system had all the bells and whistle, which means that the brains of the operation are separate from the display. These parts of the system were placed in a protective box and positioned beside the driver’s seat in the 4255. The power cable was routed back from the battery to the control box.


 This is a subscriber-only article


SHARING OPTIONS: