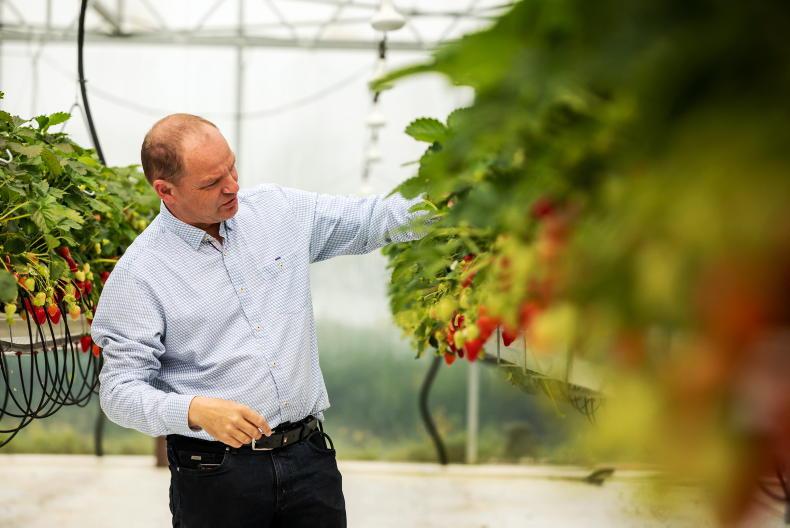
Con Traas has been operating The Apple Farm in Cahir, Co Tipperary, ever since he inherited the land from his parents. What started as their horticultural enterprise in the 1960s has since become a thriving, multi-faceted business, combining their apple orchards with an apple product line – including craft cider, apple cider vinegar and apple juice – and their greenhouse-grown cherries, strawberries and raspberries. Con also operates an agri-tourism business on the farm – a popular campground – so when you visit in the summer there is a great buzz about the place (and not just from the bees pollinating the plants).
“My parents bought the land in 1967 and probably started farming in 1968,” he tells Irish Country Living. “They came from the Netherlands originally and they had been farming in Holland but it was hard to get land at that time – a lot of people left in the post-war era – so my parents thought they would look to farm elsewhere.”
Thinking it would be the easy option, Con decided to study agricultural science when he went to college, but soon learned it wouldn’t be as easy as he expected. However, he picked up the knowledge and skills necessary to carry on his family’s fruit business and it has grown from strength to strength since. Con incorporates natural and conventional methods into his farm, striking a good balance between energy and carbon efficiency and fruit quality and yield. His seasonal berries are legendary in these parts, and he was recently awarded the 2023 Producer of the Year at the Good Food Ireland awards.

Con uses natural pest control methods in all of his greenhouses - predatory bugs \ Philip Doyle
“If you went back 30 or 40 years, there would have been a lot more chemical use in horticulture – especially outdoor growing with apples – to control insects and pests,” he explains. “But that has largely disappeared over the years, partly due to regulation but also other forms of pest control became better understood.”
Predatory bugs
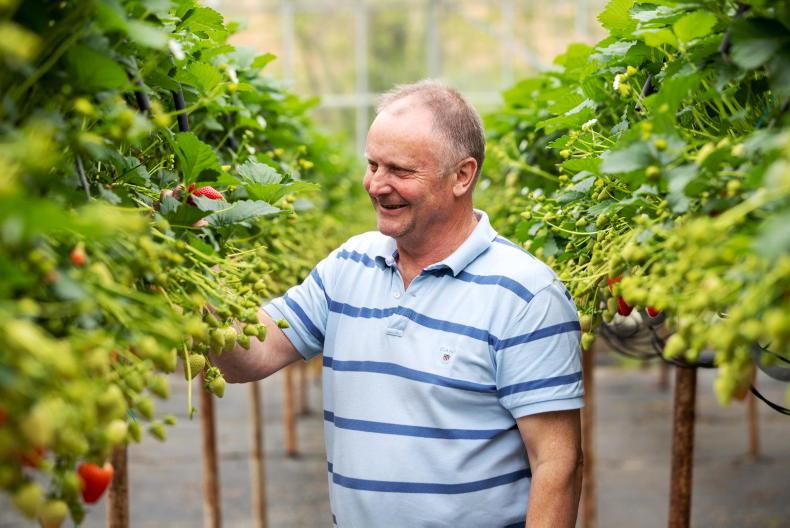
An example of this is the use of predatory bugs in Con’s greenhouses. He is able to purchase these bugs and distribute them among his plants which then feed on aphids and other pests. “It all developed together – the companies figuring out how to use these things to our advantage, and the farmers willing to adopt these new practices. A lot of conventional farmers also learned from the growing number of organic horticultural farmers, over the years.”
Con's strawberries are juicy and perfectly sweet - a real taste of summer \ Philip Doyle
While Con’s farm shop is open all year and each season has its own delights, during the summer months it is always well worth a trip to Cahir to purchase Con’s fresh strawberries, raspberries and cherries while they’re in season. Perfectly sweet and juicy on their own, we still couldn’t help but develop a few recipes which show off their best features in the Irish Country Living test kitchen.
From simple to show-stopping, why not try your hand at a few using the local Irish strawberries available to you?
theapplefarm.com
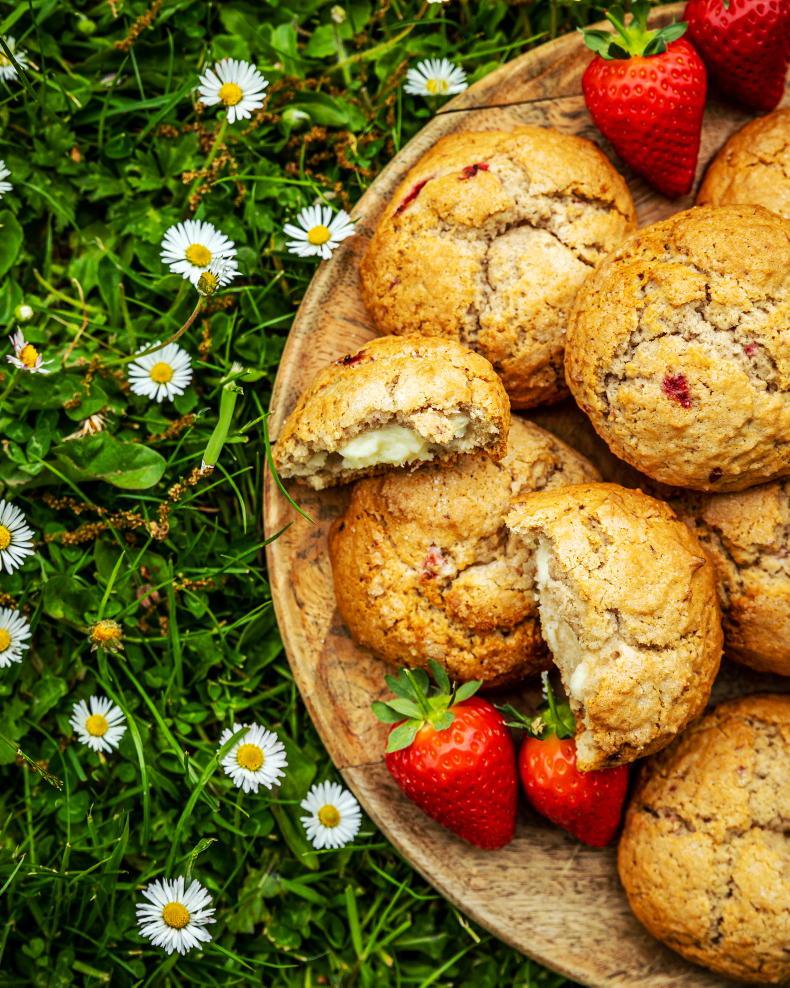
Strawberry Cheesecake Cookies
These cookies are completely addictive. Made in the style of American stuffed cookies, they are not your basic flat or chewy disc, but instead have a deliciously soft outside with a creamy cheesecake filling and fresh strawberry flavour. These cookies work best when the filling is pre-portioned and frozen, and the cookie dough has been chilled until firm, but pliable.
\ Philip Doyle
For the cheesecake filling
200g soft cheese
100g icing sugar
For the cookies
215g butter, softened
150g caster sugar
75g light brown sugar
1 tsp vanilla extract
1 large egg + 1 egg white
475g plain flour
1 tsp baking powder
½ tsp baking soda
½ tsp salt
200g fresh strawberries, washed and chopped
40g cornflour
1 Make the cheesecake filling: in a bowl, combine the soft cheese and icing sugar. Mix until completely combined.
2 Line a baking tray (or something which will fit into your freezer) with parchment. Drop dollops of the creamy filling onto the parchment by the teaspoonful (you should have about 25 dollops altogether). Place the tray into the freezer and freeze the cream cheese filling until solid.
3 Make the cookie dough: in a stand mixer fitted with the paddle attachment (or using a hand mixer), cream the butter, caster sugar and brown sugar until light, pale and fluffy (about five minutes on medium high). Add the vanilla, egg and egg white and continue to mix for an additional five minutes on the same speed.
4 Sift the flour, baking powder and baking soda into another bowl. Add the salt to this and whisk lightly, then add the dry ingredients to the butter and sugar mixture. Mix until just combined, then, using a spatula, clean down the sides of the bowl and mix briefly again to ensure everything is incorporated.
5 In a separate bowl, combine the chopped strawberries with the cornflour. Add this mixture to the cookie dough and mix until just combined (the strawberries will break up a bit – this is OK). The dough will be quite sticky at this stage. Cover the bowl with cling film and chill for two hours or overnight.
6 When the dough is chilled and the filling is frozen, preheat the oven to 190°C. Line a baking tray with parchment and set aside.
7 Assemble the cookies: I use a digital weighing scale for this (to ensure the cookies are the same size), but you don’t have to. I line the weighing scales with cling film and weigh out 60g pieces of chilled cookie dough. Then, flatten the dough in your hand and add a frozen dollop of cheesecake filling. Bring the sides of the cookie dough up and around the cheesecake filling, sealing the filling completely within the dough.
8 Place the cheesecake-filled cookie on the lined baking tray and continue assembling the cookies, flattening out the dough, adding the frozen filling and then sealing the cookies.
9 Bake in the preheated oven for 11-12 minutes, or until the cookies are golden brown all over. Remove from the oven and let them sit on the baking tray for two to three minutes before carefully moving them to a wire rack to cool completely.
10 Store the baked cookies in an airtight container for up to six days. These cookies can also be frozen for up to eight weeks (you could also freeze them after assembling and simply bake from frozen).
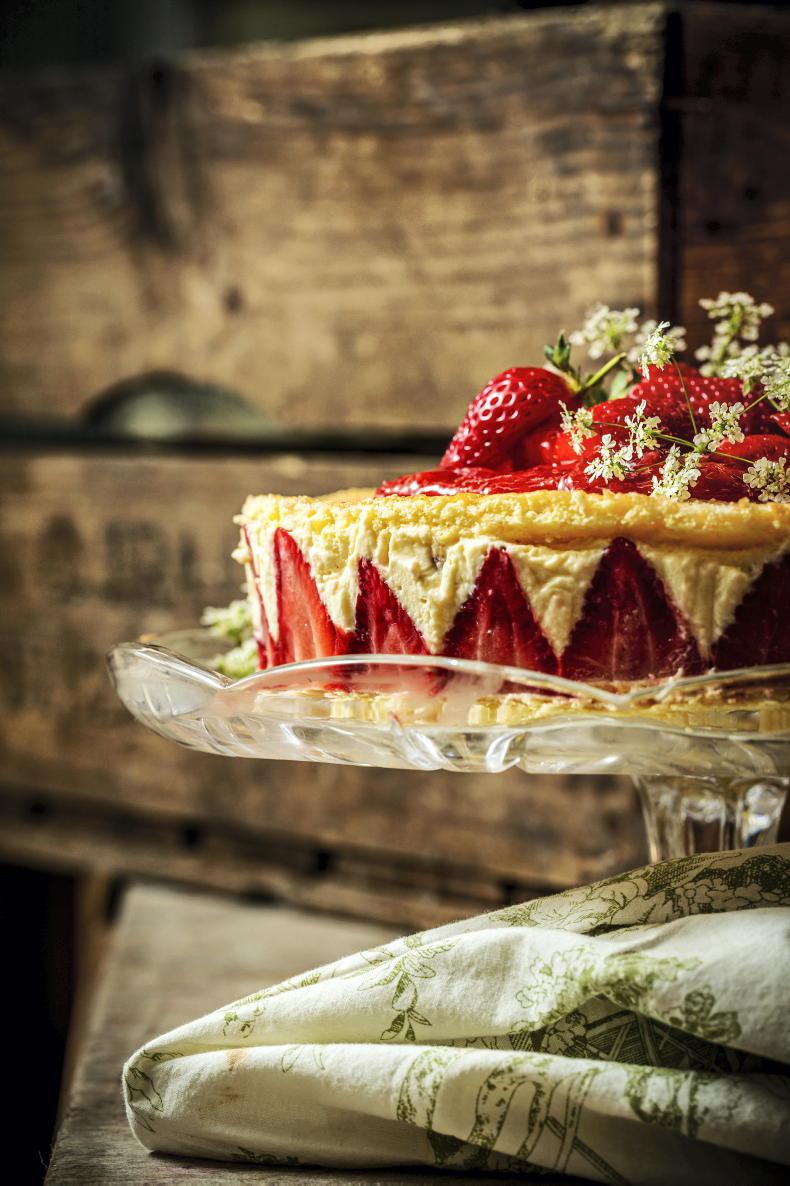
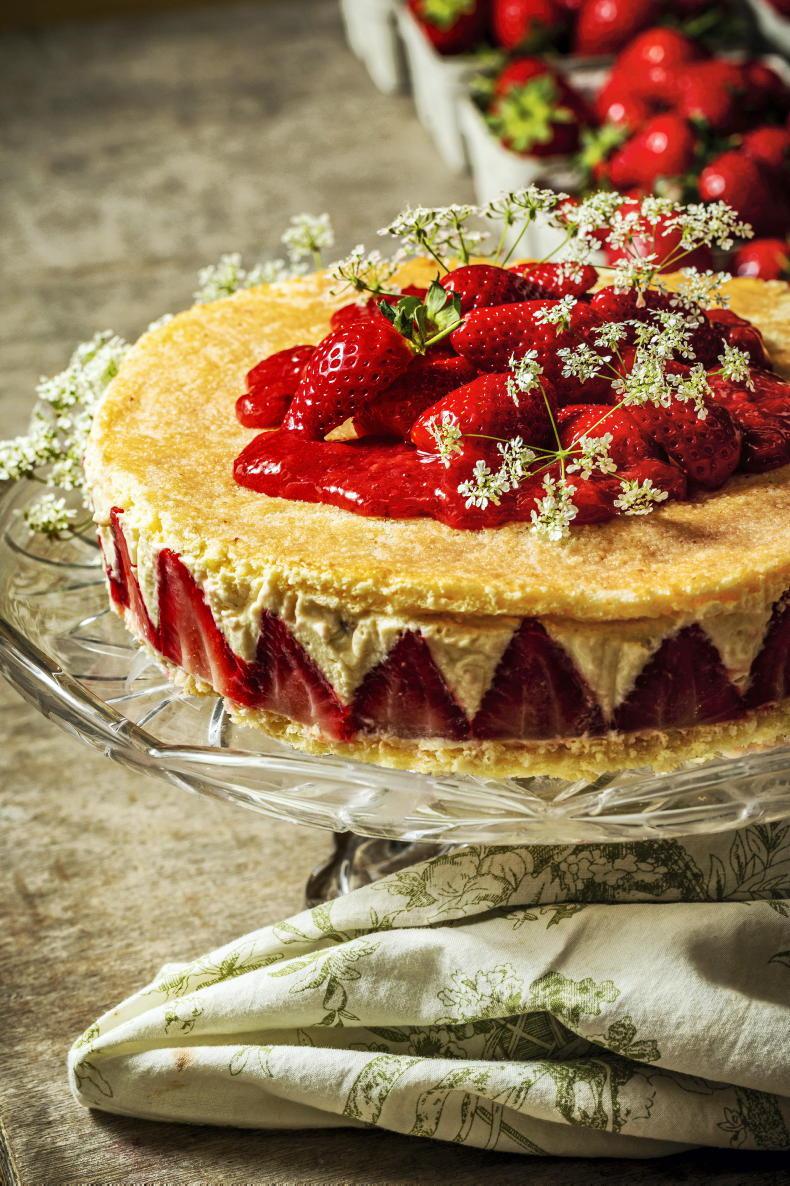
Classic Fraisier Cake \ Philip Doyle
An Irish take on a classic French dessert, this Fraisier cake combines Genoise sponge with a crème diplomat and – bien sûr – plenty of Con’s fresh strawberries. A Fraisier can also be made gluten-free by using almond sponge layers instead of Genoise. The key is to make each component well ahead of time – filling, sponge, strawberries – to ensure everything is nicely chilled when you assemble. If you can get special acetate paper for pastry work, use it to line the tin – it will give your cake lovely smooth sides. If you don’t have acetate, line the tin with cling film and wrap the cake until chilled and completely set.
For the Genoise sponge
4 large eggs, room temperature
75g caster sugar
100g plain flour
30g cornflour
For the crème diplomat
500ml full fat milk
1 vanilla bean, seeds scraped out and added into the milk (add the entire bean)
4 large egg yolks, room temperature
75g caster sugar
50g cornflour
3 sheets gelatine, softened in cold water
250ml cream, whipped to stiff peaks
For the strawberry simple syrup:
100g strawberries
200ml water
1 tsp vanilla
75g sugar
For the strawberry filling:
250g fresh strawberries, washed and chopped
70g icing sugar
12-15 tall, evenly sized strawberries, washed, hulled and sliced in half (for the strawberry border)
Classic Fraisier Cake \ Philip Doyle
1 Make the Genoise sponge: preheat the oven to 160°C and line a baking tray with parchment.
2 Using a stand mixer with the whisk attachment, whisk the eggs and sugar on medium-high speed for 10-15 minutes. The mixture should be doubled in volume, pale and smooth.
3 Working quickly and gently, sift the flour and cornflour over the egg and sugar mixture and, using a spatula, fold the flours into the mixture. You want to keep as much air in this mixture as possible, so avoid mixing too quickly.
4 Pour the batter into the prepared baking tray and smooth the top with a spatula or offset spatula. Bake in the preheated oven for 12-15 minutes, until golden brown and cooked through. Remove from the oven and cool thoroughly.
5 Make the crème diplomat: heat the milk and vanilla until just about boiling. While the milk is heating, whisk the egg yolk and caster sugar until pale and frothy – about five minutes, using a hand mixer. Add the cornflour to this mixture and whisk until completely combined.
6 When the milk has reached a boil, remove it from the heat. While whisking constantly, add a small amount of the hot milk to the egg and sugar mixture (this is to keep the eggs from scrambling). Keep adding the hot milk in small amounts until the eggs are tempered. Then, add the remaining hot milk to the eggs, whisk until combined and add this mixture back into the pot.
7 Bring the pot back to the stove top and heat the mixture gently and slowly on medium-low heat, whisking constantly, until the mixture has completely thickened. Remove from the heat and add this thickened mixture to a fresh bowl.
8 Soak the gelatine leaves in cold water until they are softened, then squeeze out as much water as you can. Add them to the hot custard and mix until they are completely dissolved. Cover with cling film and cool completely.
8 When the mixture has cooled, add the whipped cream and stir. Store in the fridge until you are ready to assemble the cake.
9 Make the strawberry simple syrup: blitz the fresh strawberries in a blender, then combine with the water, sugar and vanilla in a small saucepan. Bring to a boil and boil until the mixture is reduced by half and is the consistency of a thick syrup. Set aside to cool completely until ready to assemble.
10 Add the fresh, chopped strawberries to a bowl and combine with the icing sugar. Set aside.
11 Once all of the components are completely cooled, you can begin to assemble the cake. Start by taking a springform cake tin (20-22cm in diameter) and cutting out two sponge circles to fit into the tin. If you don’t have enough sponge for two full circles, cut out one perfect circle for the top sponge layer and use a few odd pieces of sponge for the bottom layer (it will come together once soaked in the syrup).
12 Line the sides of the tin with acetate paper, or line the entire tin with cling film (leaving plenty hanging over the sides). Place the less-nice sponge layer at the base of the tin and generously brush with half of the strawberry syrup.
13 Add a layer of the crème diplomat to this first layer of sponge, then take your halved strawberries and line the side of the tin with them (the cut tops should sit into the crème diplomat and stay put while the cut sides should face out).
14 Take the strawberry and icing sugar mixture and add that to the remaining crème diplomat. Add this to the centre of the cake, as the filling, then top with the nicer layer of sponge. Add the final half of the strawberry syrup to the top sponge, then cover with cling film and chill in the fridge for four hours or overnight.
15 When ready to serve, gently remove the cake from the springform tin. Remove the acetate or cling film and place on a cake stand. Top the Fraisier with more fresh strawberries and/or the mixed berry compote from the mixed berry, rose and pistachio pastry recipe. Store in the fridge for up to three days.
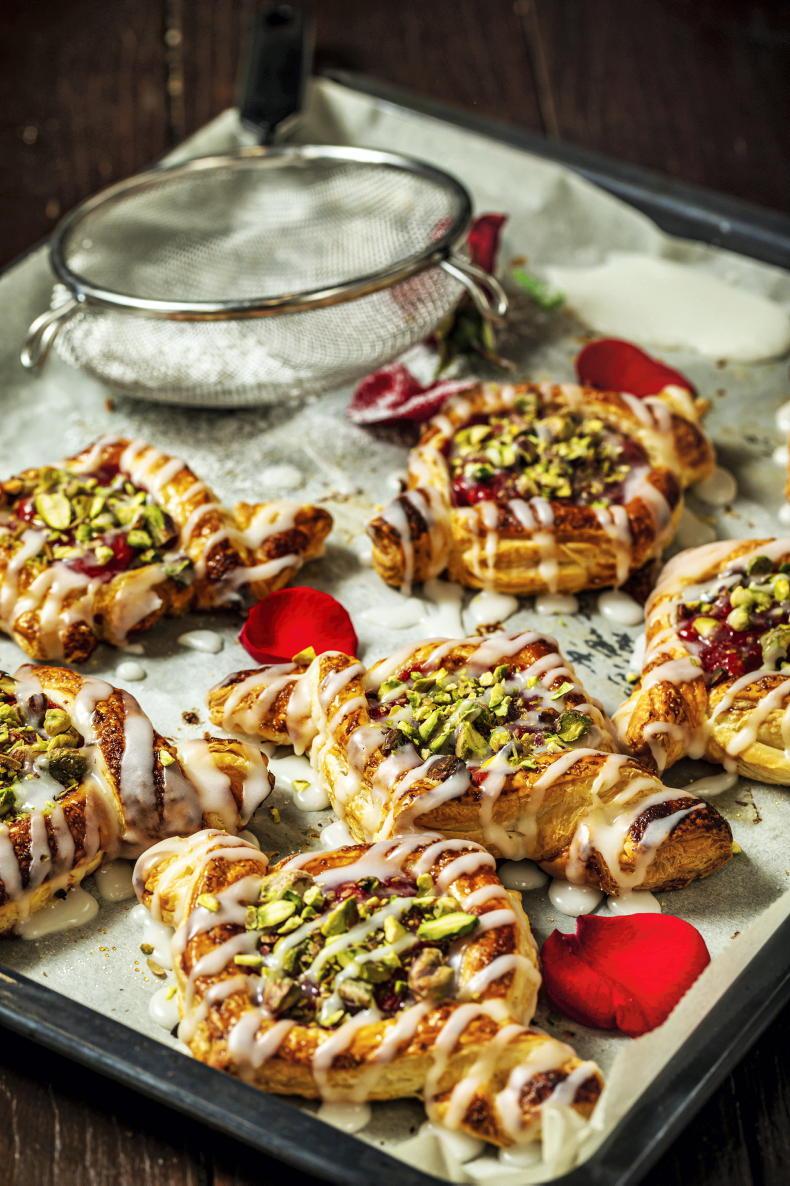
Mixed berry, rose and pistachio pastries
We were thinking of deliciously flaky Danish pastries when we came up with this recipe. The crunch of the pistachios with the flaky pastry pairs perfectly with Con’s sweet mixed berry compote. The rose icing completes the recipe, making an elegant option for brunch, breakfast or afternoon tea. These pastries look impressive, but they are deceptively simple to make.
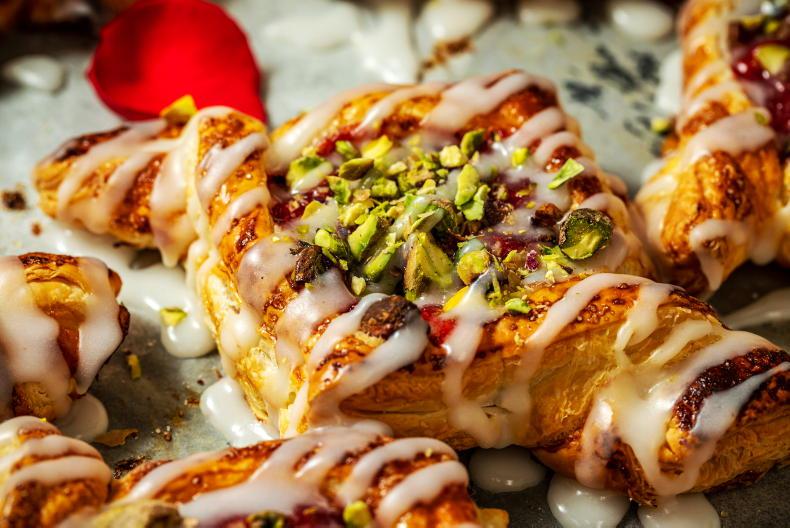
Strawberry, rose and pistachio pastries \ Philip Doyle
For the mixed berry compote:
600g fresh strawberries, raspberries and pitted cherries roughly chopped
200ml water
250g caster sugar
Juice and rind of one lemon
1 tsp vanilla
40g cornflour, mixed with 25g water
For the rose icing:
500g icing sugar
1 tsp vanilla
1 tsp rose water
4-5 tbsp full fat milk
For the pastries:
375g shop-bought puff pastry (look for one made with butter)
250g shelled pistachios, roughly chopped
1 egg, lightly beaten
Caster sugar, for sprinkling
1 Make the compote: in a large saucepan, add the berries and cherries, water, caster sugar, vanilla and lemon rind and juice.
2 Bring the mixed berries to a boil and cook for five to eight minutes, until the mixture has reduced slightly and the berries have softened. Add the cornflour mixed with water and stir, continuing to boil.
3 The cornflour will thicken the compote. Let it cook for one to two minutes, until you can no longer see any of the cornflour residue, then remove from the heat. Move the compote to another dish and let cool completely.
4 When the compote has cooled, add it to a food processor or blender and pulse several times, to make more of a thick berry sauce. Place the compote in a bowl and set aside until ready to use.
5 Make the pastries: preheat the oven to 200°C and line a baking tray with parchment. Roll out the puff pastry to a large rectangular shape (or leave as is if it is pre-rolled). Using a knife, cut the pastry into eight equal portions (squares).
Strawberry, rose and pistachio pastries \ Philip Doyle
6 Using a small knife, cut along the inside of each square of puff pastry, moving along one of the corners moving along one of the corners to make an “L” shape, roughly 1.5-2cm in from the edge. Do the same on the opposite corner, cutting along the inside of the square to make another “L” shape. Gently lift the outer corners and flip them to the opposite side to make a crossover shape.
7 In the centre of each pastry, add 1Tbsp of mixed berry compote. Brush the edges of the pastry with the beaten egg wash and lightly sprinkle the tops with caster sugar. Bake the pastries for 20-25 minutes, until golden brown and fully baked through.
8 Add the chopped pistachios to the tops and let cool. While cooling, make the rose water icing: combine all of the icing ingredients in a bowl and whisk until smooth. Drizzle the icing over each pastry and top with more pistachios, if desired.
9 Once cooled, eat the pastries while still fresh. for up to five days.
Read more
This Easter, say it with hot fudge
The Producer’s Plate: upping your holiday brunch game with Killarney Urban Farm
Con Traas has been operating The Apple Farm in Cahir, Co Tipperary, ever since he inherited the land from his parents. What started as their horticultural enterprise in the 1960s has since become a thriving, multi-faceted business, combining their apple orchards with an apple product line – including craft cider, apple cider vinegar and apple juice – and their greenhouse-grown cherries, strawberries and raspberries. Con also operates an agri-tourism business on the farm – a popular campground – so when you visit in the summer there is a great buzz about the place (and not just from the bees pollinating the plants).
“My parents bought the land in 1967 and probably started farming in 1968,” he tells Irish Country Living. “They came from the Netherlands originally and they had been farming in Holland but it was hard to get land at that time – a lot of people left in the post-war era – so my parents thought they would look to farm elsewhere.”
Thinking it would be the easy option, Con decided to study agricultural science when he went to college, but soon learned it wouldn’t be as easy as he expected. However, he picked up the knowledge and skills necessary to carry on his family’s fruit business and it has grown from strength to strength since. Con incorporates natural and conventional methods into his farm, striking a good balance between energy and carbon efficiency and fruit quality and yield. His seasonal berries are legendary in these parts, and he was recently awarded the 2023 Producer of the Year at the Good Food Ireland awards.
Con uses natural pest control methods in all of his greenhouses - predatory bugs \ Philip Doyle
“If you went back 30 or 40 years, there would have been a lot more chemical use in horticulture – especially outdoor growing with apples – to control insects and pests,” he explains. “But that has largely disappeared over the years, partly due to regulation but also other forms of pest control became better understood.”
Predatory bugs
An example of this is the use of predatory bugs in Con’s greenhouses. He is able to purchase these bugs and distribute them among his plants which then feed on aphids and other pests. “It all developed together – the companies figuring out how to use these things to our advantage, and the farmers willing to adopt these new practices. A lot of conventional farmers also learned from the growing number of organic horticultural farmers, over the years.”
Con's strawberries are juicy and perfectly sweet - a real taste of summer \ Philip Doyle
While Con’s farm shop is open all year and each season has its own delights, during the summer months it is always well worth a trip to Cahir to purchase Con’s fresh strawberries, raspberries and cherries while they’re in season. Perfectly sweet and juicy on their own, we still couldn’t help but develop a few recipes which show off their best features in the Irish Country Living test kitchen.
From simple to show-stopping, why not try your hand at a few using the local Irish strawberries available to you?
theapplefarm.com
Strawberry Cheesecake Cookies
These cookies are completely addictive. Made in the style of American stuffed cookies, they are not your basic flat or chewy disc, but instead have a deliciously soft outside with a creamy cheesecake filling and fresh strawberry flavour. These cookies work best when the filling is pre-portioned and frozen, and the cookie dough has been chilled until firm, but pliable.
\ Philip Doyle
For the cheesecake filling
200g soft cheese
100g icing sugar
For the cookies
215g butter, softened
150g caster sugar
75g light brown sugar
1 tsp vanilla extract
1 large egg + 1 egg white
475g plain flour
1 tsp baking powder
½ tsp baking soda
½ tsp salt
200g fresh strawberries, washed and chopped
40g cornflour
1 Make the cheesecake filling: in a bowl, combine the soft cheese and icing sugar. Mix until completely combined.
2 Line a baking tray (or something which will fit into your freezer) with parchment. Drop dollops of the creamy filling onto the parchment by the teaspoonful (you should have about 25 dollops altogether). Place the tray into the freezer and freeze the cream cheese filling until solid.
3 Make the cookie dough: in a stand mixer fitted with the paddle attachment (or using a hand mixer), cream the butter, caster sugar and brown sugar until light, pale and fluffy (about five minutes on medium high). Add the vanilla, egg and egg white and continue to mix for an additional five minutes on the same speed.
4 Sift the flour, baking powder and baking soda into another bowl. Add the salt to this and whisk lightly, then add the dry ingredients to the butter and sugar mixture. Mix until just combined, then, using a spatula, clean down the sides of the bowl and mix briefly again to ensure everything is incorporated.
5 In a separate bowl, combine the chopped strawberries with the cornflour. Add this mixture to the cookie dough and mix until just combined (the strawberries will break up a bit – this is OK). The dough will be quite sticky at this stage. Cover the bowl with cling film and chill for two hours or overnight.
6 When the dough is chilled and the filling is frozen, preheat the oven to 190°C. Line a baking tray with parchment and set aside.
7 Assemble the cookies: I use a digital weighing scale for this (to ensure the cookies are the same size), but you don’t have to. I line the weighing scales with cling film and weigh out 60g pieces of chilled cookie dough. Then, flatten the dough in your hand and add a frozen dollop of cheesecake filling. Bring the sides of the cookie dough up and around the cheesecake filling, sealing the filling completely within the dough.
8 Place the cheesecake-filled cookie on the lined baking tray and continue assembling the cookies, flattening out the dough, adding the frozen filling and then sealing the cookies.
9 Bake in the preheated oven for 11-12 minutes, or until the cookies are golden brown all over. Remove from the oven and let them sit on the baking tray for two to three minutes before carefully moving them to a wire rack to cool completely.
10 Store the baked cookies in an airtight container for up to six days. These cookies can also be frozen for up to eight weeks (you could also freeze them after assembling and simply bake from frozen).
Classic Fraisier Cake \ Philip Doyle
An Irish take on a classic French dessert, this Fraisier cake combines Genoise sponge with a crème diplomat and – bien sûr – plenty of Con’s fresh strawberries. A Fraisier can also be made gluten-free by using almond sponge layers instead of Genoise. The key is to make each component well ahead of time – filling, sponge, strawberries – to ensure everything is nicely chilled when you assemble. If you can get special acetate paper for pastry work, use it to line the tin – it will give your cake lovely smooth sides. If you don’t have acetate, line the tin with cling film and wrap the cake until chilled and completely set.
For the Genoise sponge
4 large eggs, room temperature
75g caster sugar
100g plain flour
30g cornflour
For the crème diplomat
500ml full fat milk
1 vanilla bean, seeds scraped out and added into the milk (add the entire bean)
4 large egg yolks, room temperature
75g caster sugar
50g cornflour
3 sheets gelatine, softened in cold water
250ml cream, whipped to stiff peaks
For the strawberry simple syrup:
100g strawberries
200ml water
1 tsp vanilla
75g sugar
For the strawberry filling:
250g fresh strawberries, washed and chopped
70g icing sugar
12-15 tall, evenly sized strawberries, washed, hulled and sliced in half (for the strawberry border)
Classic Fraisier Cake \ Philip Doyle
1 Make the Genoise sponge: preheat the oven to 160°C and line a baking tray with parchment.
2 Using a stand mixer with the whisk attachment, whisk the eggs and sugar on medium-high speed for 10-15 minutes. The mixture should be doubled in volume, pale and smooth.
3 Working quickly and gently, sift the flour and cornflour over the egg and sugar mixture and, using a spatula, fold the flours into the mixture. You want to keep as much air in this mixture as possible, so avoid mixing too quickly.
4 Pour the batter into the prepared baking tray and smooth the top with a spatula or offset spatula. Bake in the preheated oven for 12-15 minutes, until golden brown and cooked through. Remove from the oven and cool thoroughly.
5 Make the crème diplomat: heat the milk and vanilla until just about boiling. While the milk is heating, whisk the egg yolk and caster sugar until pale and frothy – about five minutes, using a hand mixer. Add the cornflour to this mixture and whisk until completely combined.
6 When the milk has reached a boil, remove it from the heat. While whisking constantly, add a small amount of the hot milk to the egg and sugar mixture (this is to keep the eggs from scrambling). Keep adding the hot milk in small amounts until the eggs are tempered. Then, add the remaining hot milk to the eggs, whisk until combined and add this mixture back into the pot.
7 Bring the pot back to the stove top and heat the mixture gently and slowly on medium-low heat, whisking constantly, until the mixture has completely thickened. Remove from the heat and add this thickened mixture to a fresh bowl.
8 Soak the gelatine leaves in cold water until they are softened, then squeeze out as much water as you can. Add them to the hot custard and mix until they are completely dissolved. Cover with cling film and cool completely.
8 When the mixture has cooled, add the whipped cream and stir. Store in the fridge until you are ready to assemble the cake.
9 Make the strawberry simple syrup: blitz the fresh strawberries in a blender, then combine with the water, sugar and vanilla in a small saucepan. Bring to a boil and boil until the mixture is reduced by half and is the consistency of a thick syrup. Set aside to cool completely until ready to assemble.
10 Add the fresh, chopped strawberries to a bowl and combine with the icing sugar. Set aside.
11 Once all of the components are completely cooled, you can begin to assemble the cake. Start by taking a springform cake tin (20-22cm in diameter) and cutting out two sponge circles to fit into the tin. If you don’t have enough sponge for two full circles, cut out one perfect circle for the top sponge layer and use a few odd pieces of sponge for the bottom layer (it will come together once soaked in the syrup).
12 Line the sides of the tin with acetate paper, or line the entire tin with cling film (leaving plenty hanging over the sides). Place the less-nice sponge layer at the base of the tin and generously brush with half of the strawberry syrup.
13 Add a layer of the crème diplomat to this first layer of sponge, then take your halved strawberries and line the side of the tin with them (the cut tops should sit into the crème diplomat and stay put while the cut sides should face out).
14 Take the strawberry and icing sugar mixture and add that to the remaining crème diplomat. Add this to the centre of the cake, as the filling, then top with the nicer layer of sponge. Add the final half of the strawberry syrup to the top sponge, then cover with cling film and chill in the fridge for four hours or overnight.
15 When ready to serve, gently remove the cake from the springform tin. Remove the acetate or cling film and place on a cake stand. Top the Fraisier with more fresh strawberries and/or the mixed berry compote from the mixed berry, rose and pistachio pastry recipe. Store in the fridge for up to three days.
Mixed berry, rose and pistachio pastries
We were thinking of deliciously flaky Danish pastries when we came up with this recipe. The crunch of the pistachios with the flaky pastry pairs perfectly with Con’s sweet mixed berry compote. The rose icing completes the recipe, making an elegant option for brunch, breakfast or afternoon tea. These pastries look impressive, but they are deceptively simple to make.
Strawberry, rose and pistachio pastries \ Philip Doyle
For the mixed berry compote:
600g fresh strawberries, raspberries and pitted cherries roughly chopped
200ml water
250g caster sugar
Juice and rind of one lemon
1 tsp vanilla
40g cornflour, mixed with 25g water
For the rose icing:
500g icing sugar
1 tsp vanilla
1 tsp rose water
4-5 tbsp full fat milk
For the pastries:
375g shop-bought puff pastry (look for one made with butter)
250g shelled pistachios, roughly chopped
1 egg, lightly beaten
Caster sugar, for sprinkling
1 Make the compote: in a large saucepan, add the berries and cherries, water, caster sugar, vanilla and lemon rind and juice.
2 Bring the mixed berries to a boil and cook for five to eight minutes, until the mixture has reduced slightly and the berries have softened. Add the cornflour mixed with water and stir, continuing to boil.
3 The cornflour will thicken the compote. Let it cook for one to two minutes, until you can no longer see any of the cornflour residue, then remove from the heat. Move the compote to another dish and let cool completely.
4 When the compote has cooled, add it to a food processor or blender and pulse several times, to make more of a thick berry sauce. Place the compote in a bowl and set aside until ready to use.
5 Make the pastries: preheat the oven to 200°C and line a baking tray with parchment. Roll out the puff pastry to a large rectangular shape (or leave as is if it is pre-rolled). Using a knife, cut the pastry into eight equal portions (squares).
Strawberry, rose and pistachio pastries \ Philip Doyle
6 Using a small knife, cut along the inside of each square of puff pastry, moving along one of the corners moving along one of the corners to make an “L” shape, roughly 1.5-2cm in from the edge. Do the same on the opposite corner, cutting along the inside of the square to make another “L” shape. Gently lift the outer corners and flip them to the opposite side to make a crossover shape.
7 In the centre of each pastry, add 1Tbsp of mixed berry compote. Brush the edges of the pastry with the beaten egg wash and lightly sprinkle the tops with caster sugar. Bake the pastries for 20-25 minutes, until golden brown and fully baked through.
8 Add the chopped pistachios to the tops and let cool. While cooling, make the rose water icing: combine all of the icing ingredients in a bowl and whisk until smooth. Drizzle the icing over each pastry and top with more pistachios, if desired.
9 Once cooled, eat the pastries while still fresh. for up to five days.
Read more
This Easter, say it with hot fudge
The Producer’s Plate: upping your holiday brunch game with Killarney Urban Farm


SHARING OPTIONS